
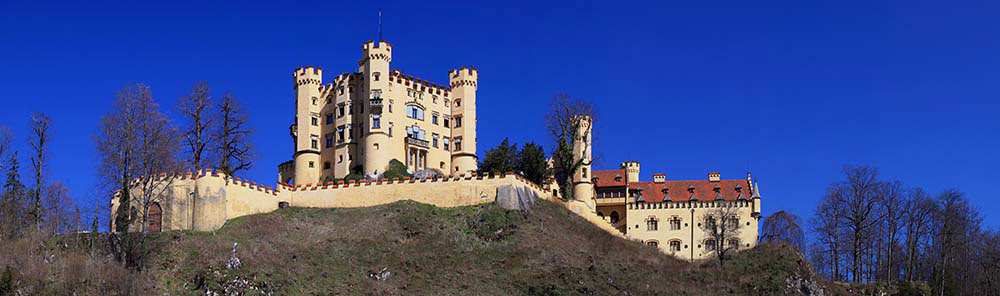
Building of interest: Schloss Hohenschwangau - Main entrance, Schwangau, Germany
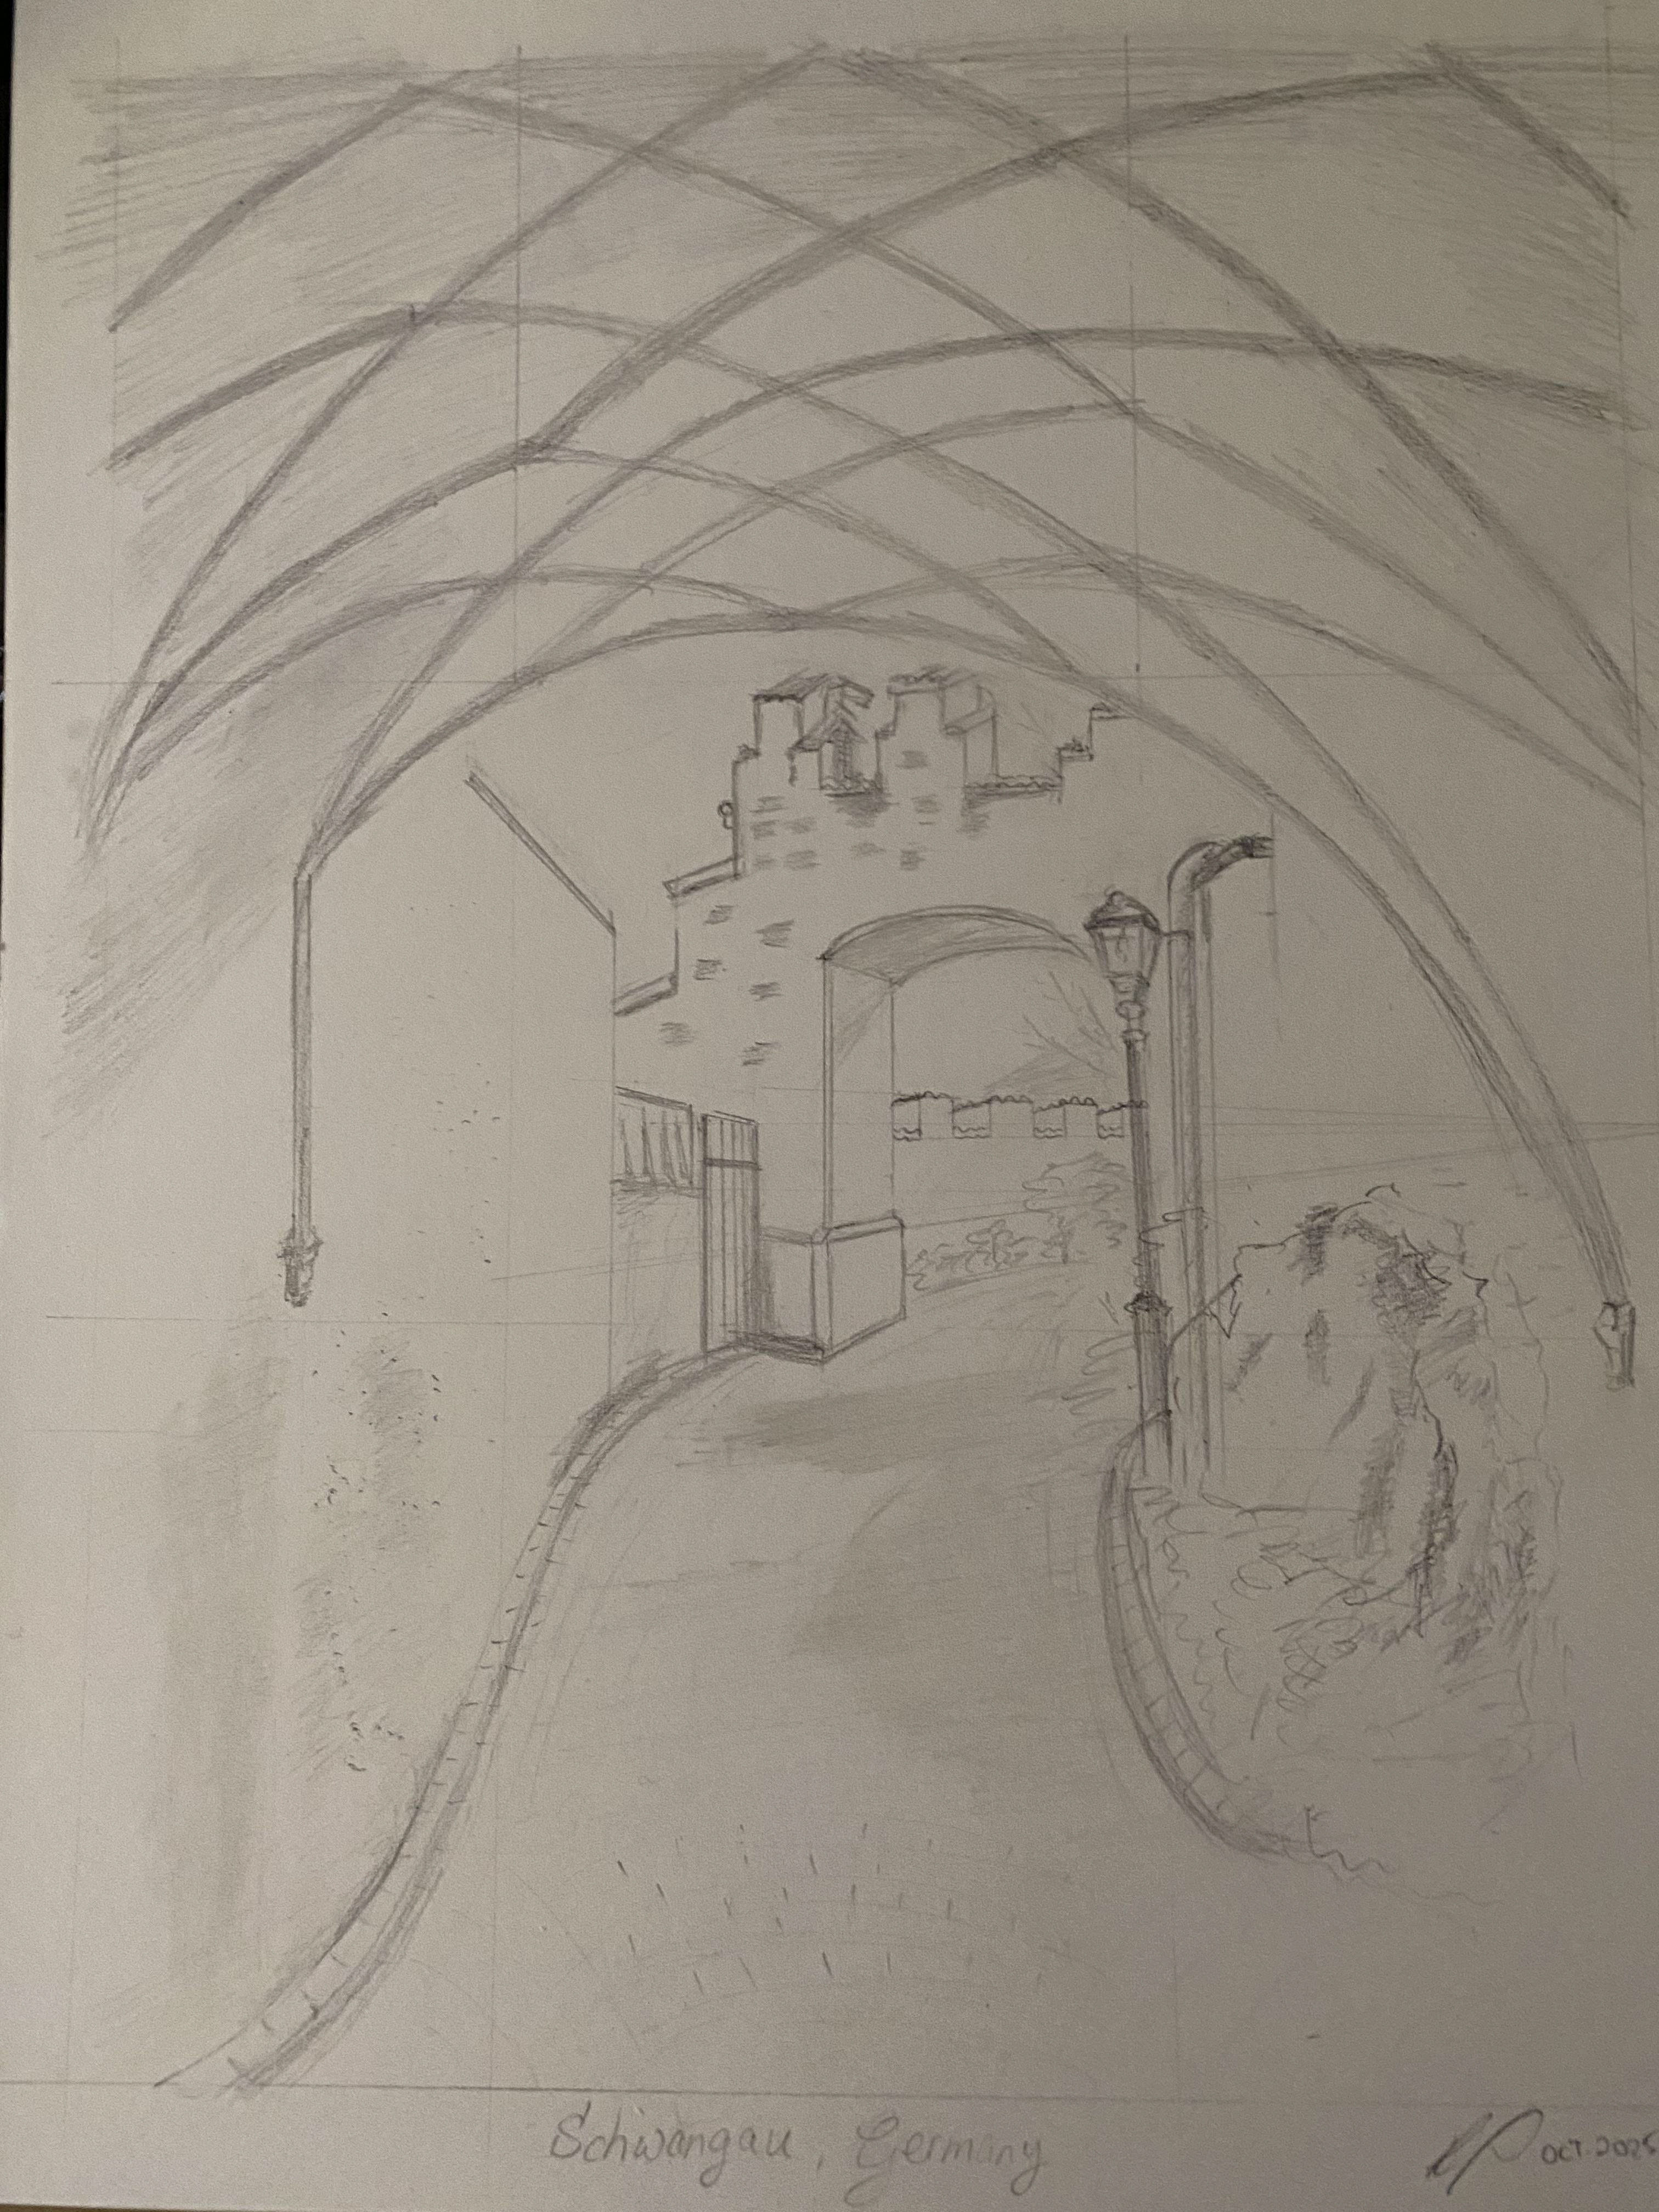
Process Sketch
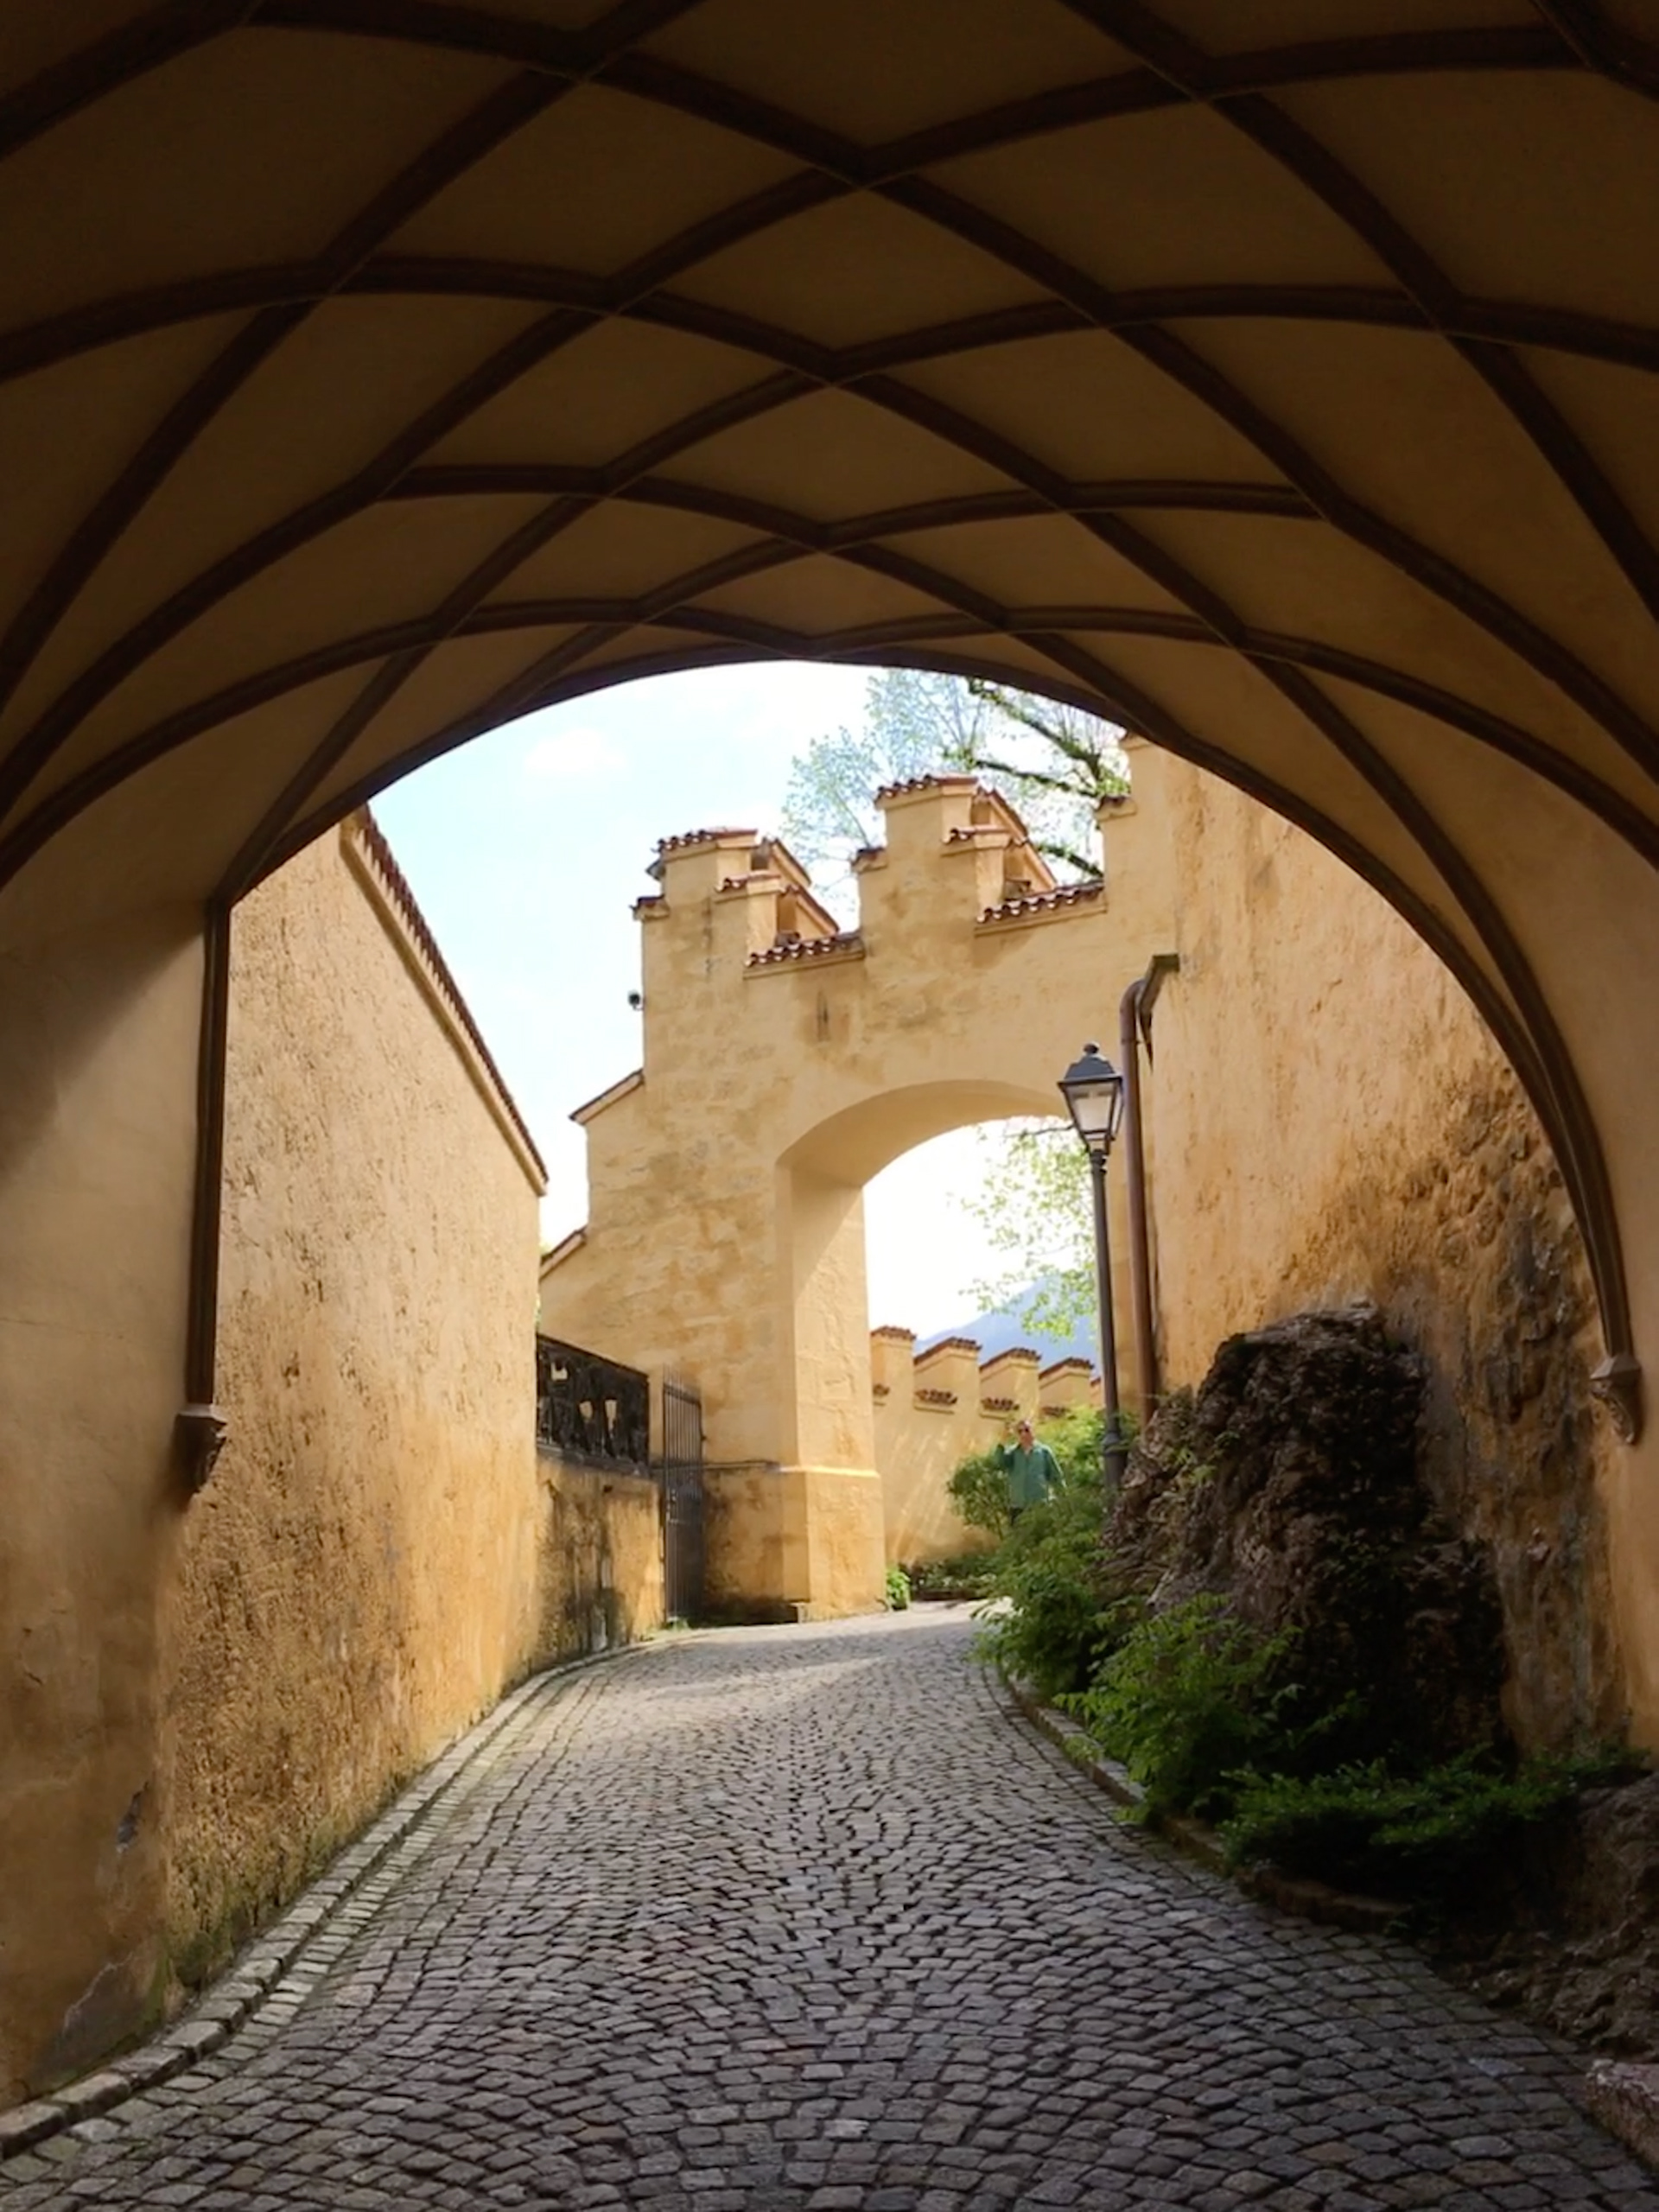
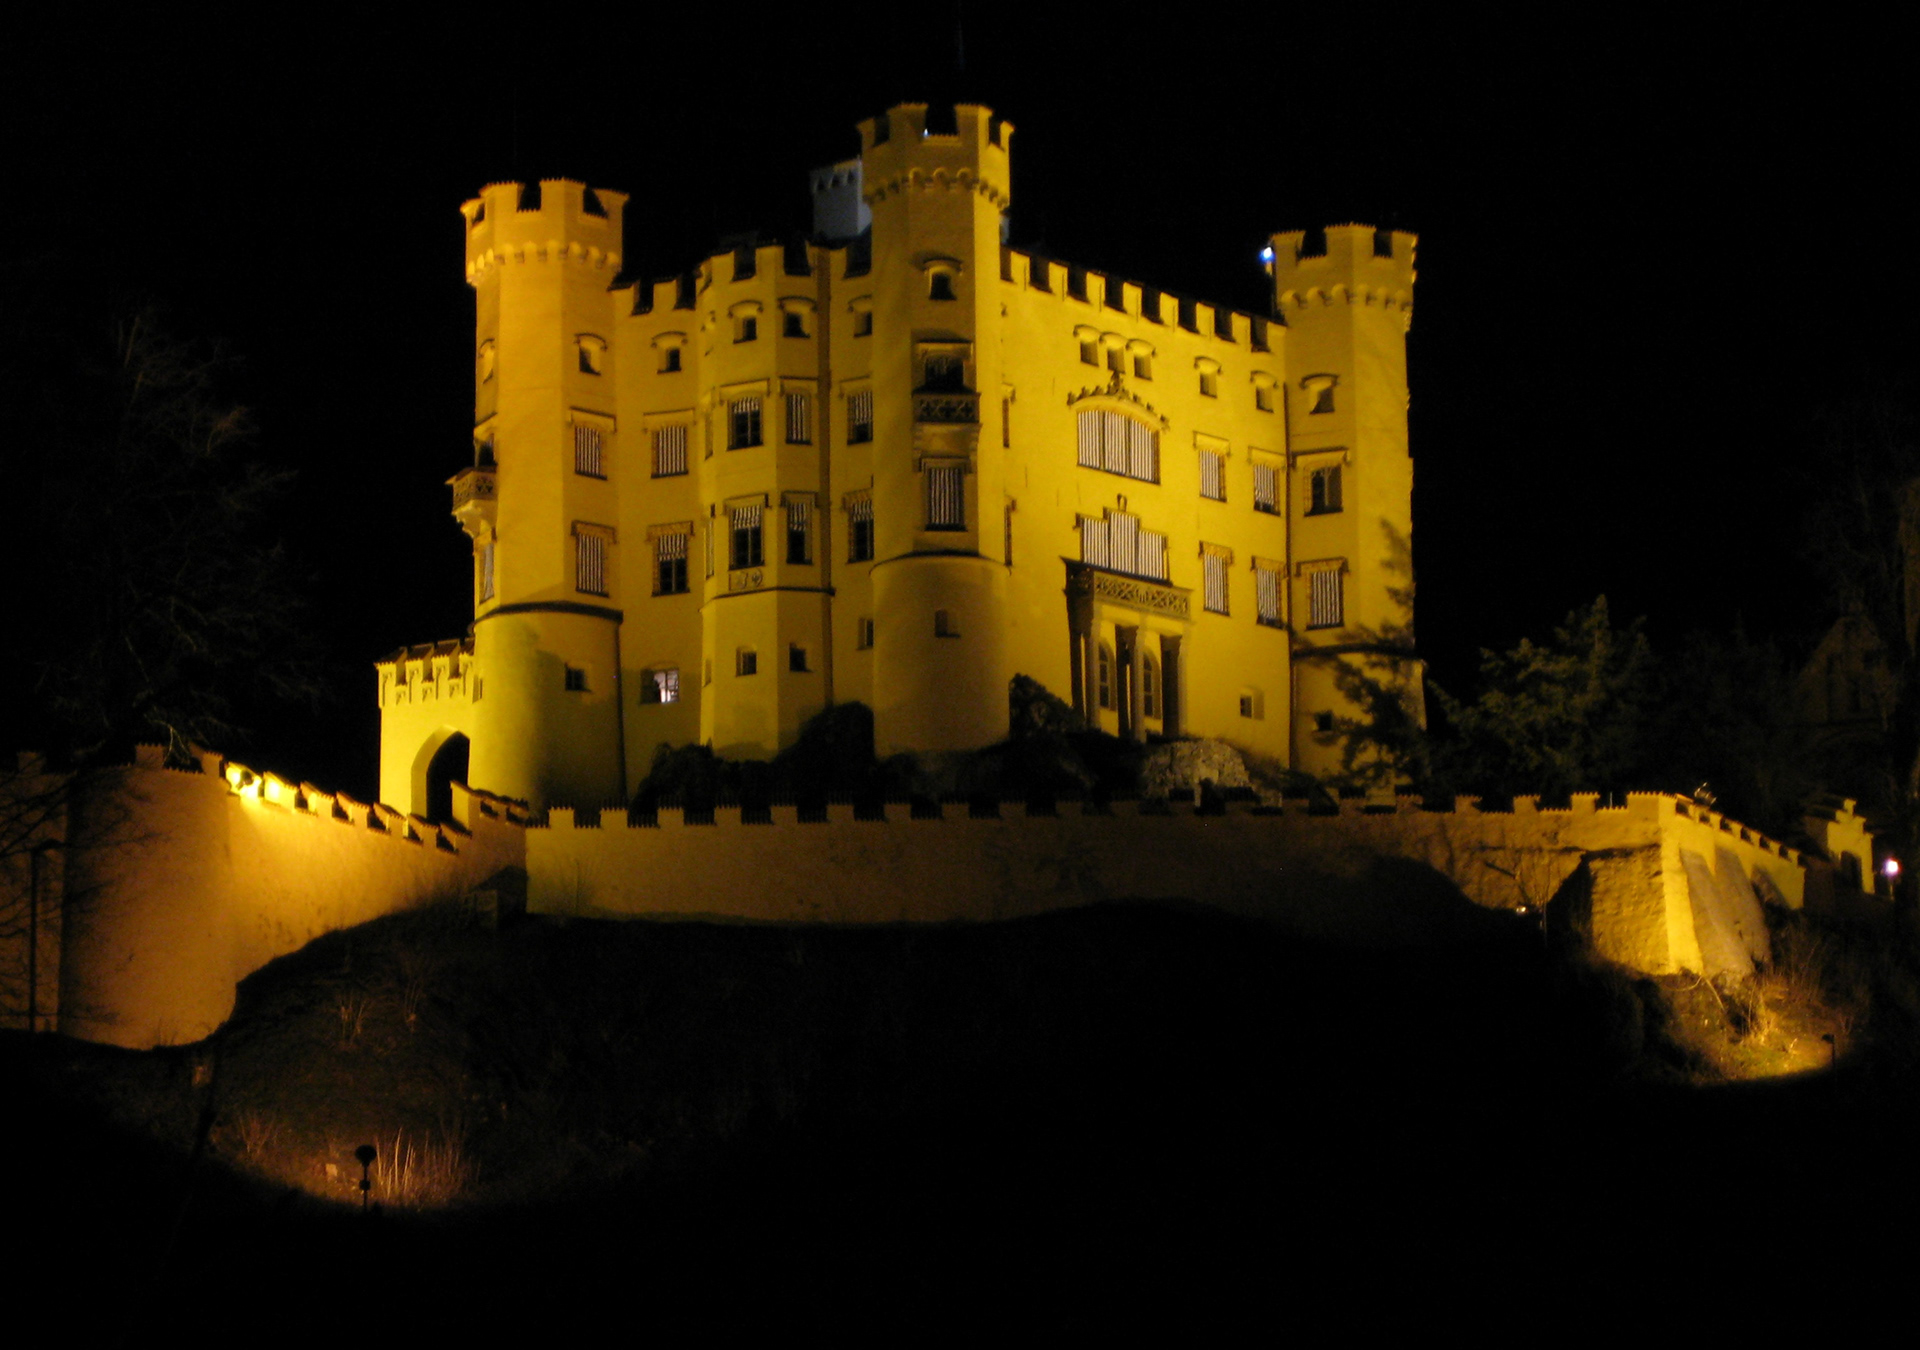
1. Sketch based off a photograph I took while travelling in Germany in 2019
Process Sketch
1. Sketch based off a photograph I took while travelling in Germany in 2019
Why this photo is chosen for my process sketch study?
Here is the sloped path passing the main entrance gate at the Hohenschwangau Castle. Once passed the curve, the main castle is in sight.
This photo is chosen because it has the most fundamental building materials, basic geometries, and often the path leading to the castle is overshadowed by the main castle itself.
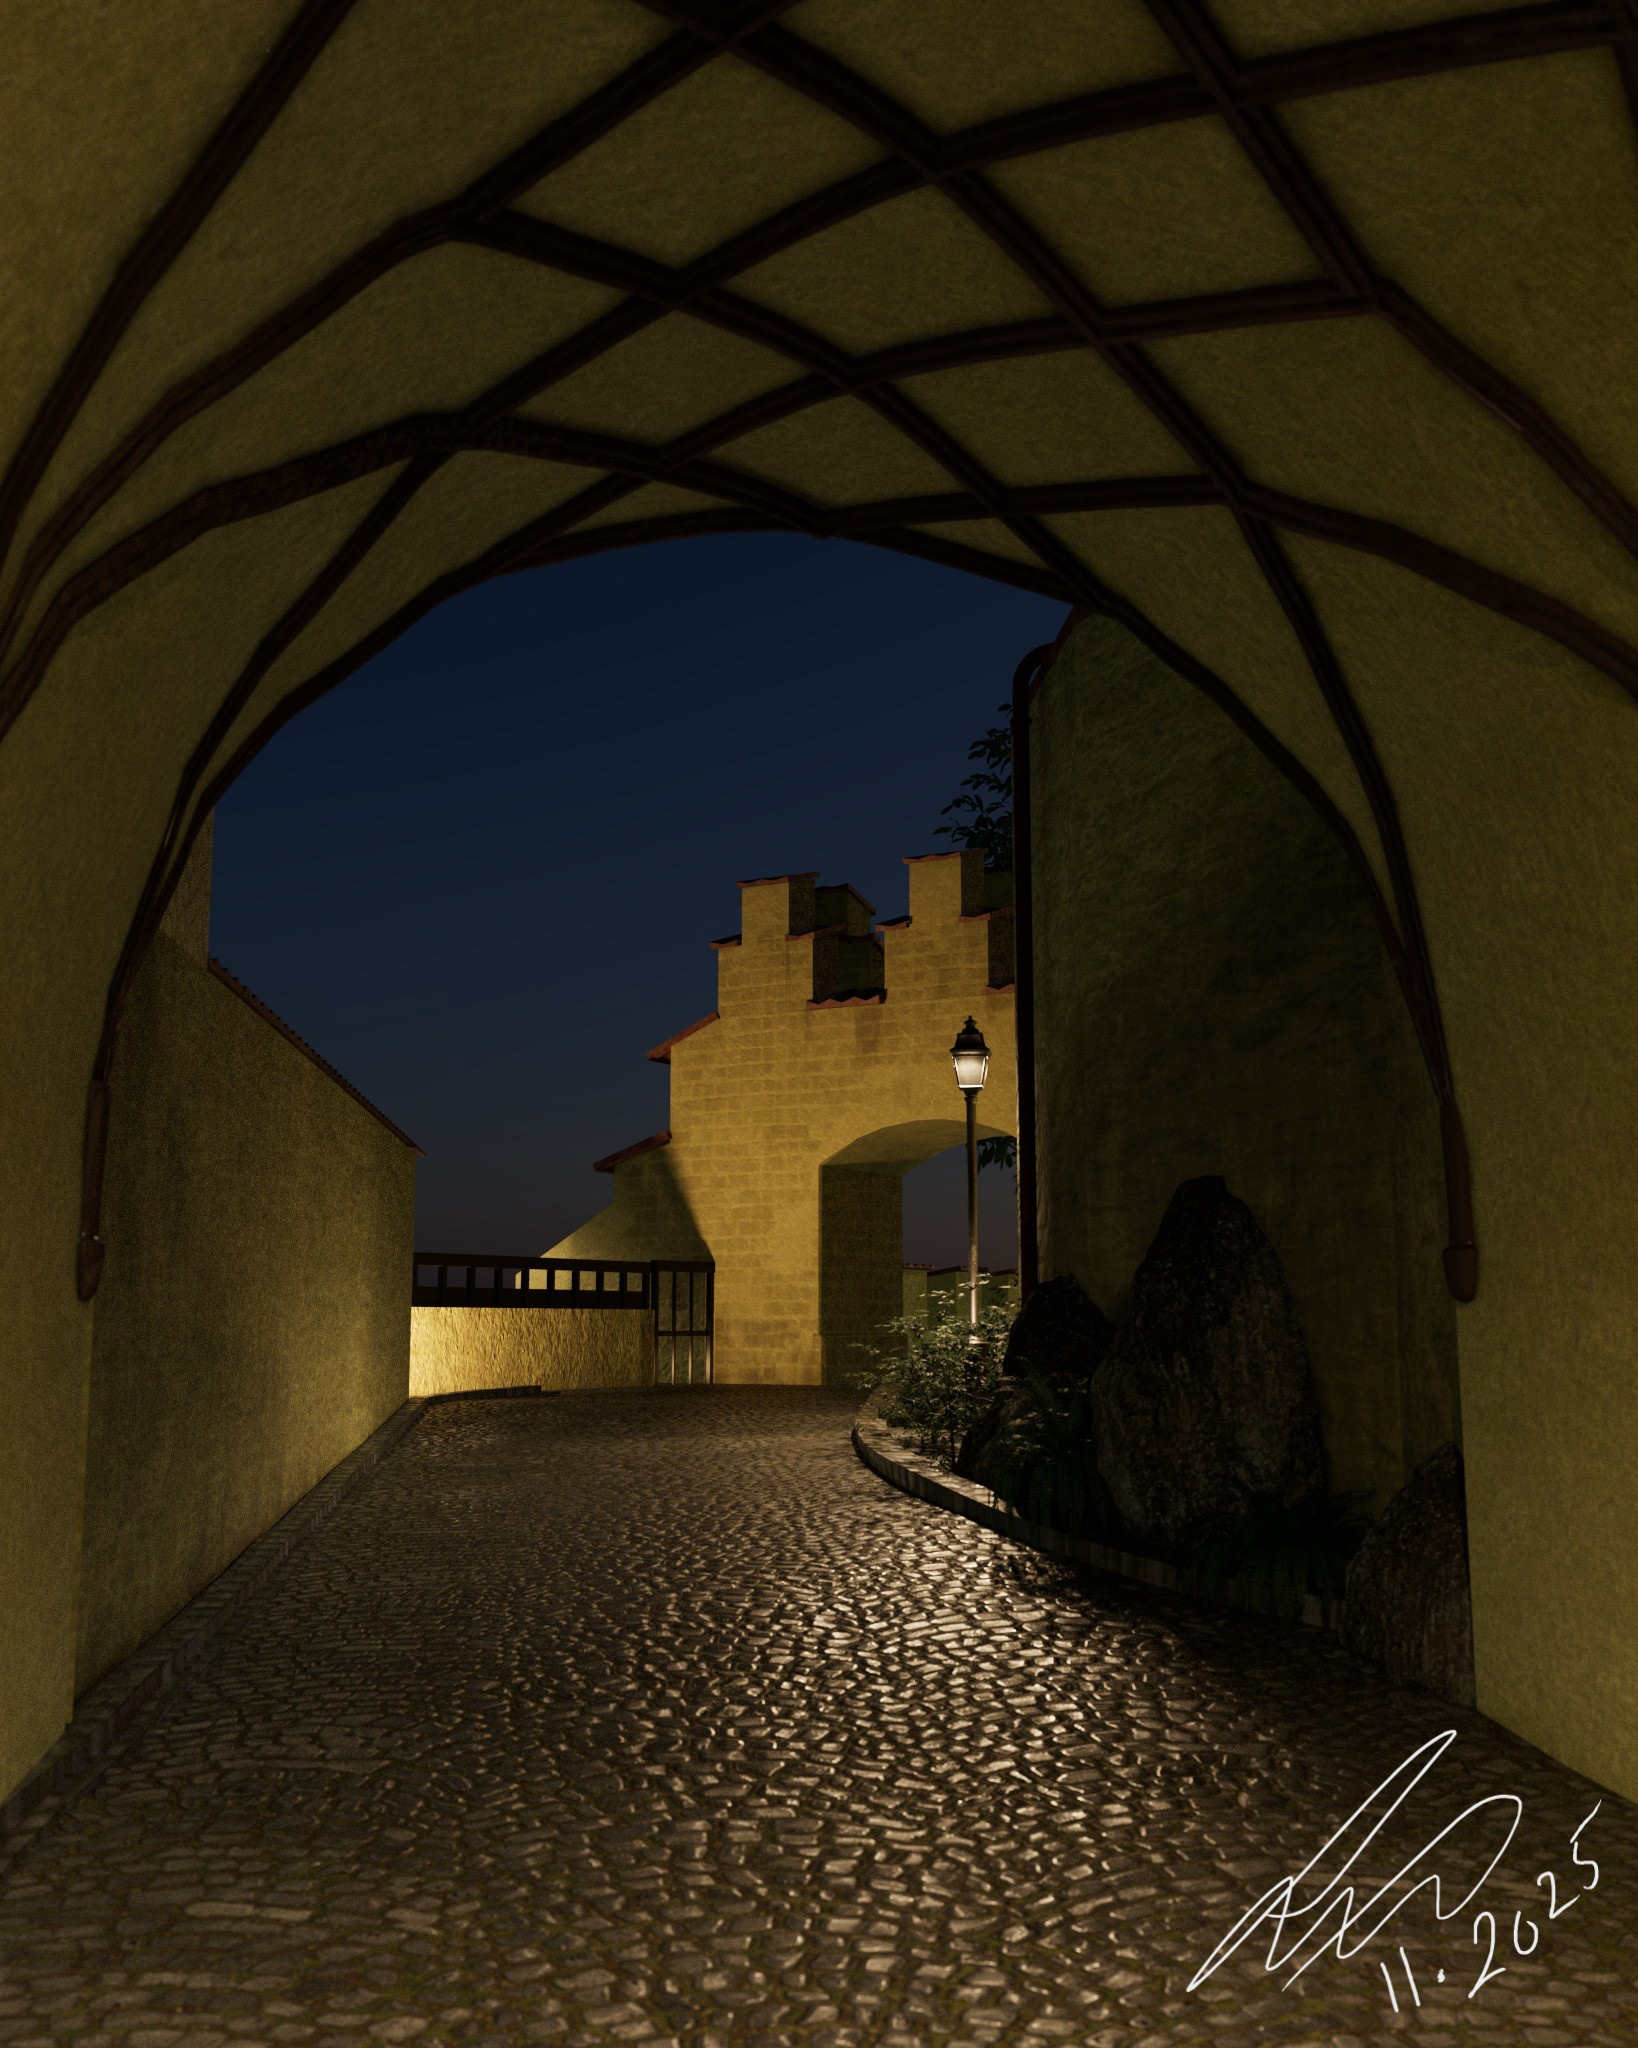
The goal is to recreate this photograph in CG and it turn into night time rendering
2. Getting to know the place, the architectural materials, building up mood, perspective, scale, and composition
The sketching exercise is to work out the perspective and the architectural detail in my head. What are the materials used to build the wall? How did the arch beams connect to create the pattern in the tunnel? What is the camera lens I need to achieve a similar perspective in CG?
Building materials:
Cobblestone for the ground
Plaster over bricks for the walls
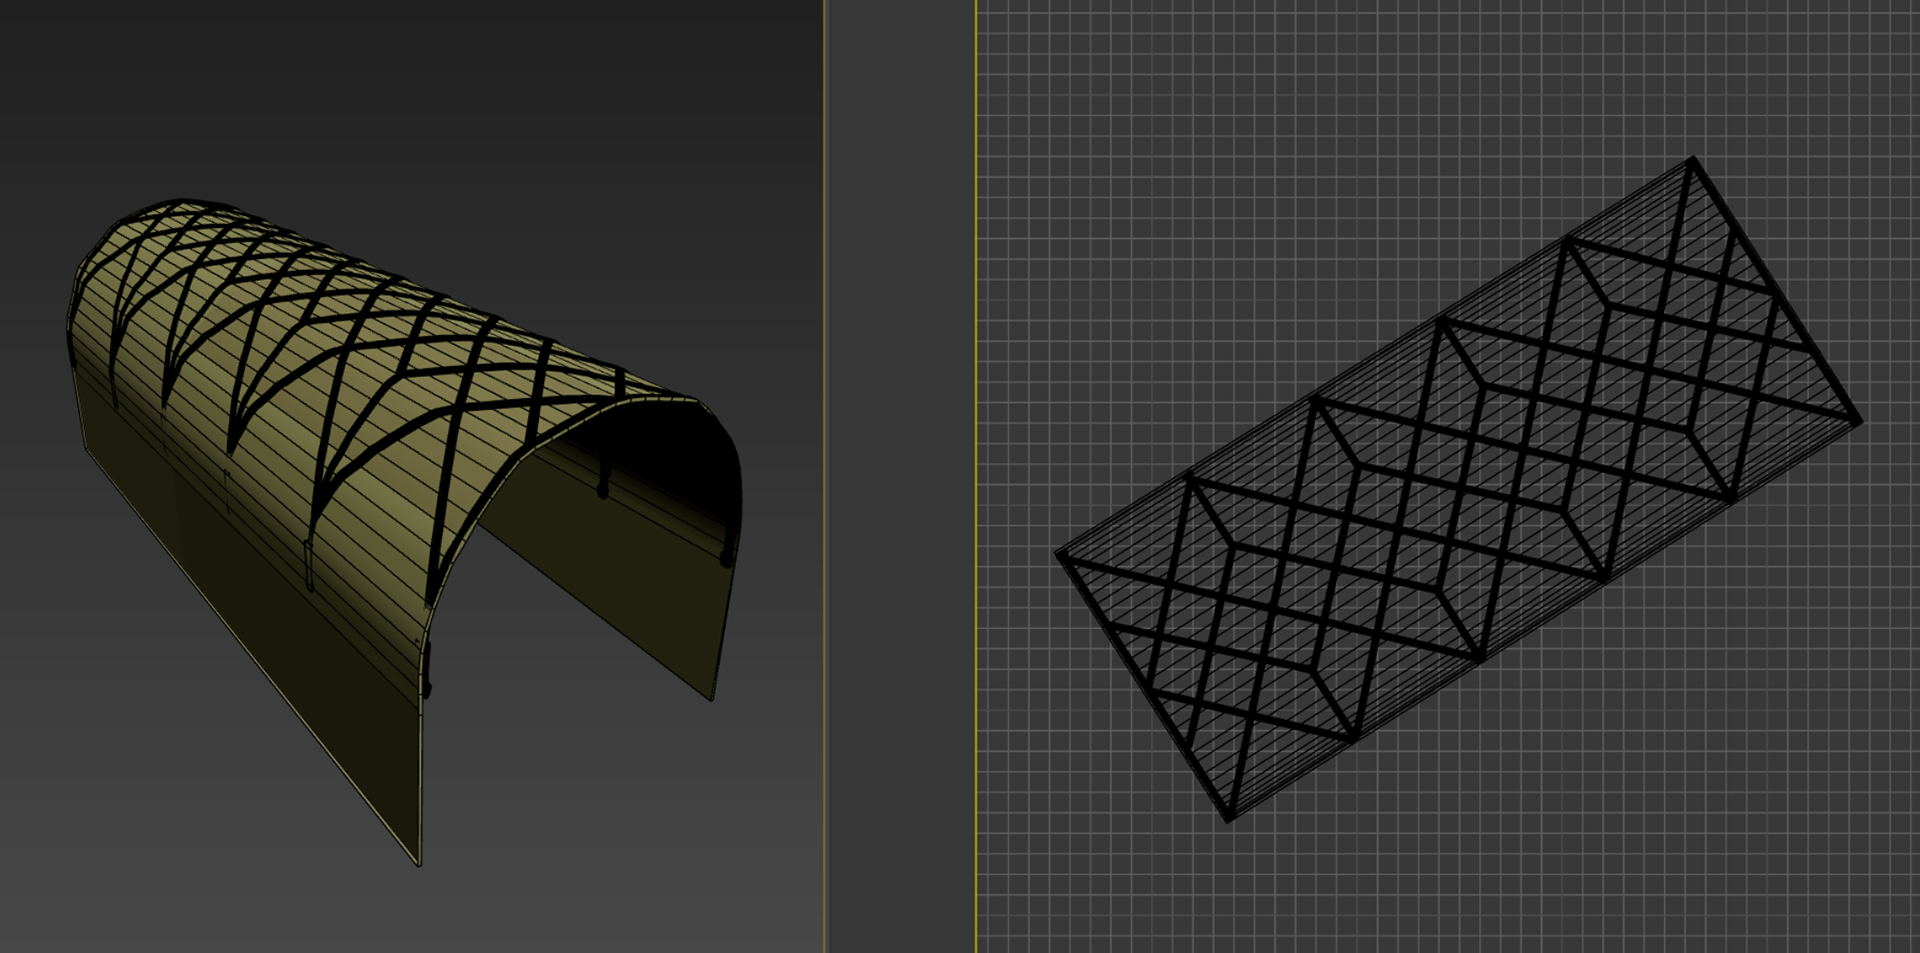
Wood for the decorative arches
Boulders from the mountain
Cobblestone for the ground
Plaster over bricks for the walls
Wood for the decorative arches
Boulders from the mountain

Translate sketch in 3D
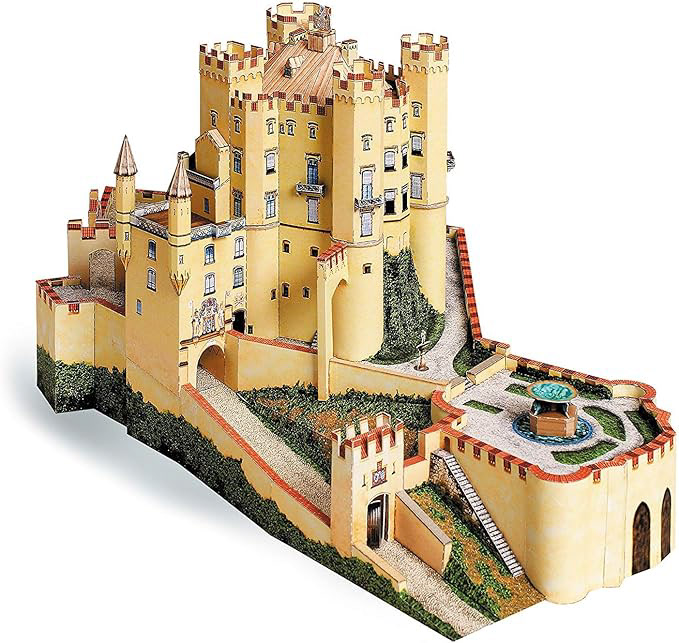
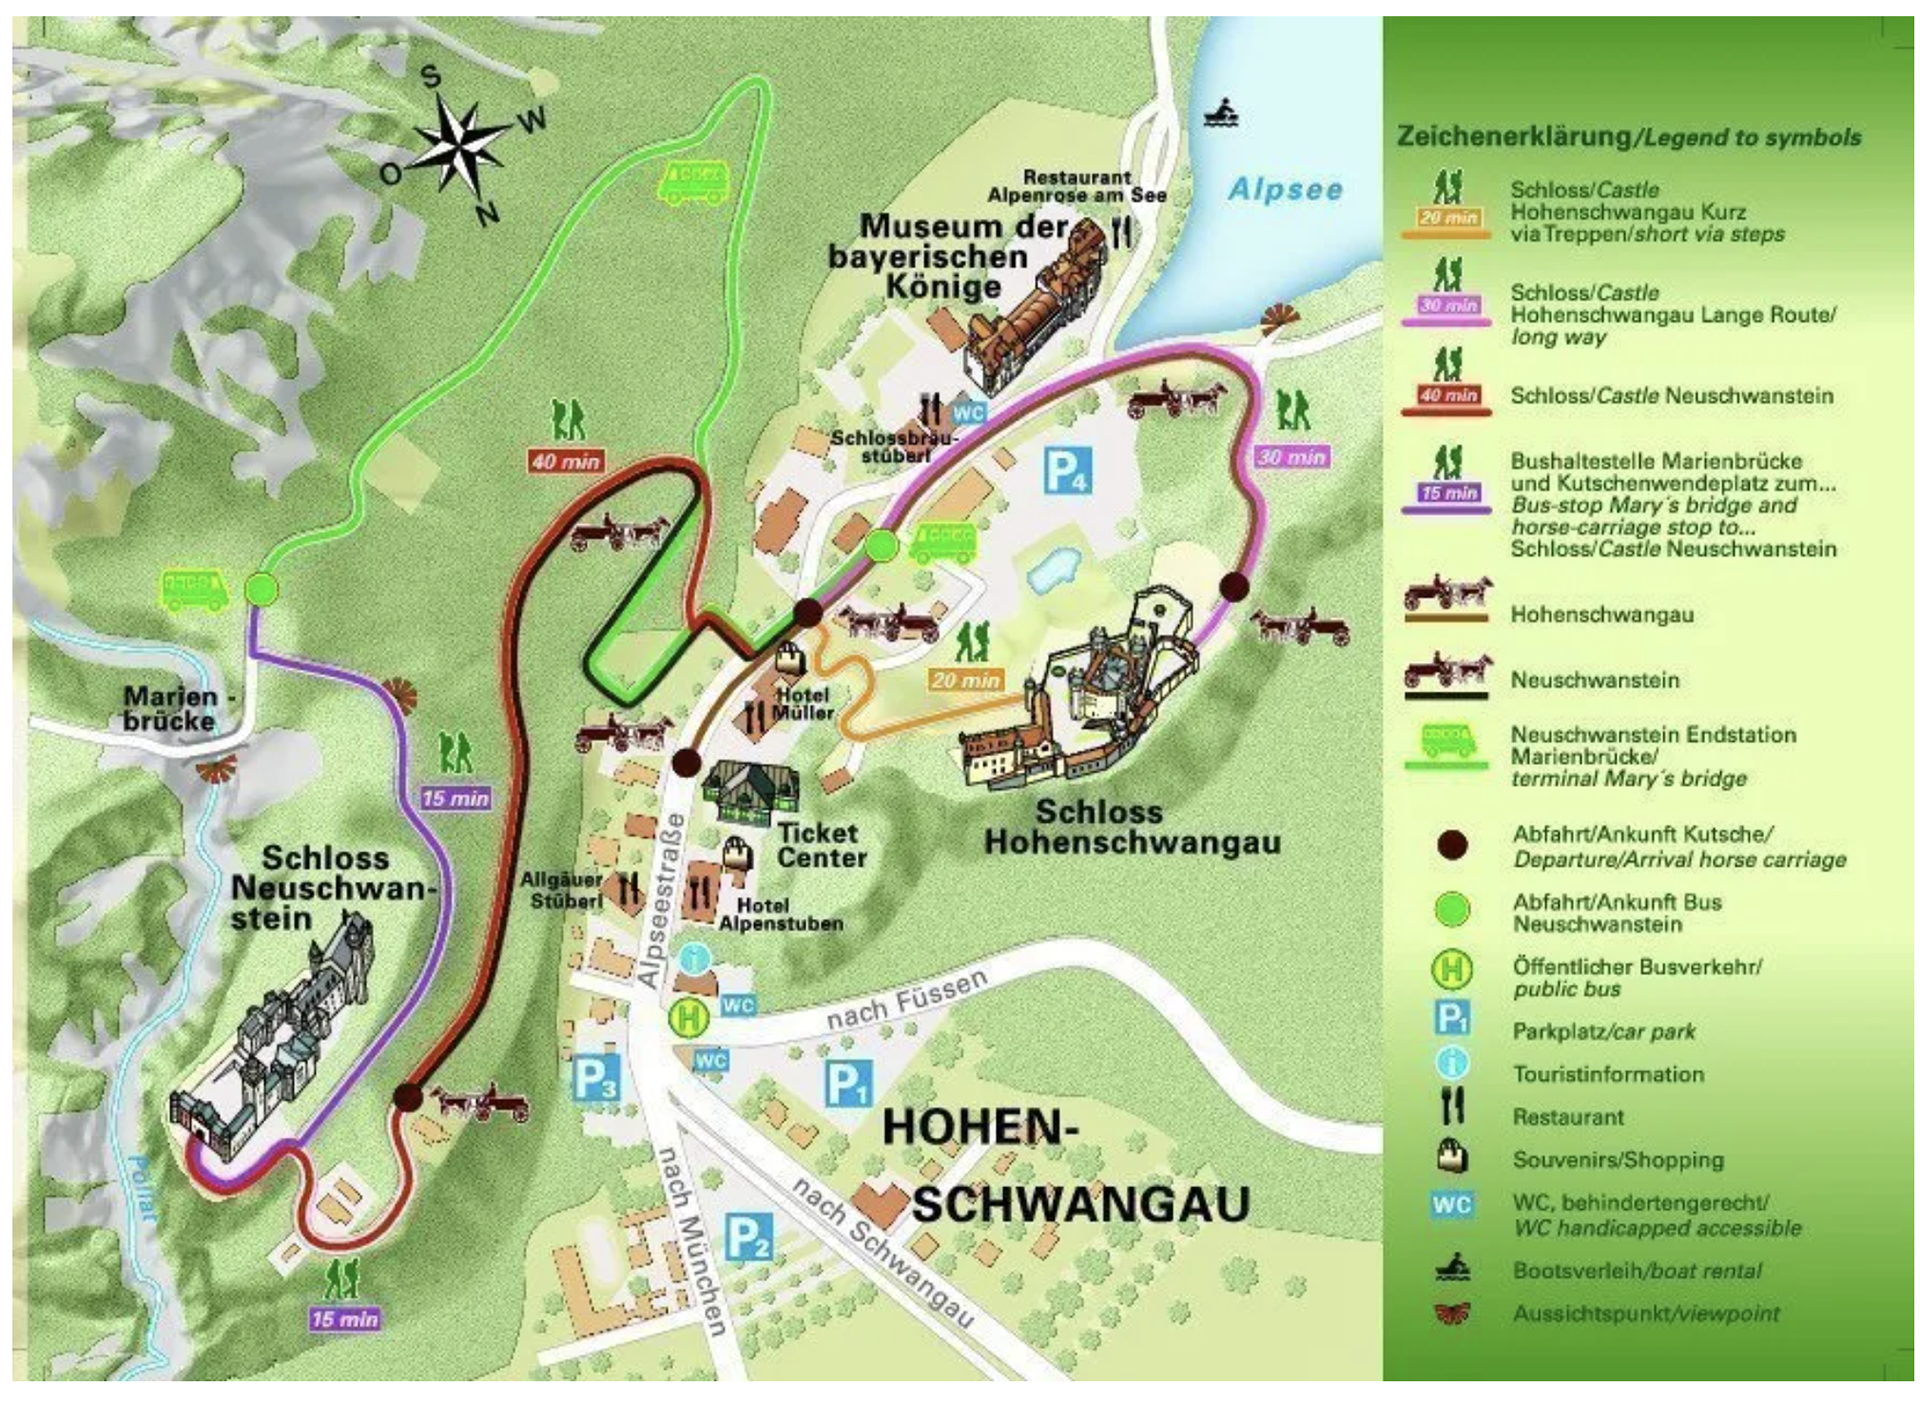
Look for building references:
Geographic data, orientation, image references of building features, scale and 3d models
A paper 3d scale model of the building by Schreiber-Bogen and visitor map of the site Hohenschwangau
3D SCENE PREPARATION
I downloaded a SketchUp 3d model of the building from 3D Warehouse to get started on building the scene. The original model is available to download here:
https://3dwarehouse.sketchup.com
I downloaded a SketchUp 3d model of the building from 3D Warehouse to get started on building the scene. The original model is available to download here:
https://3dwarehouse.sketchup.com
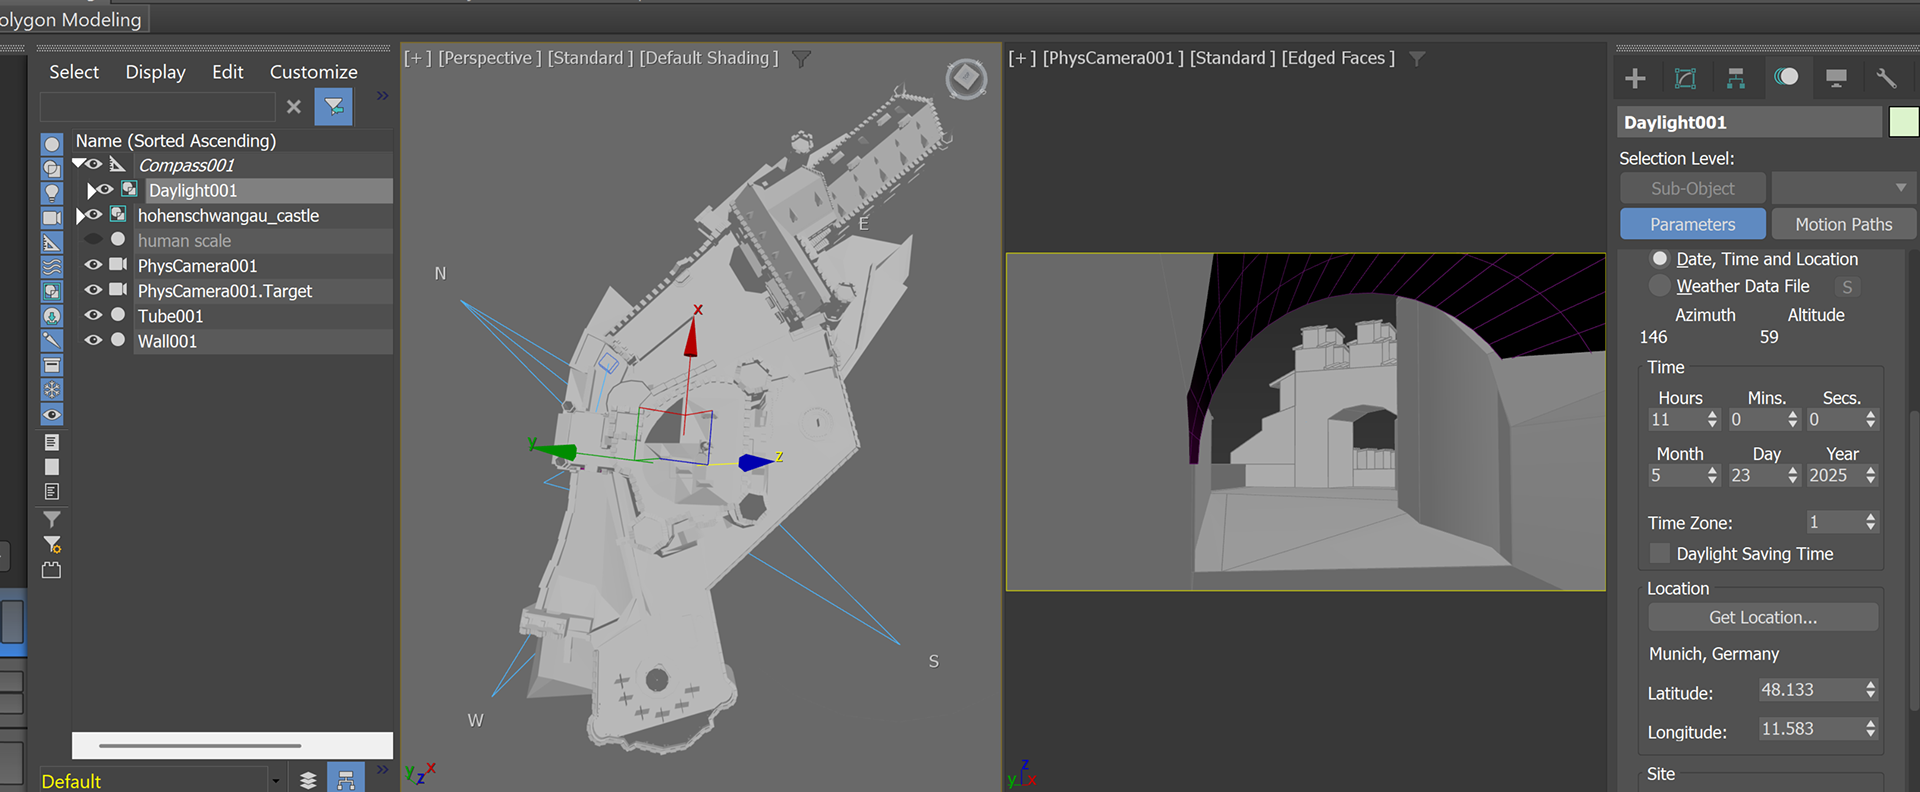
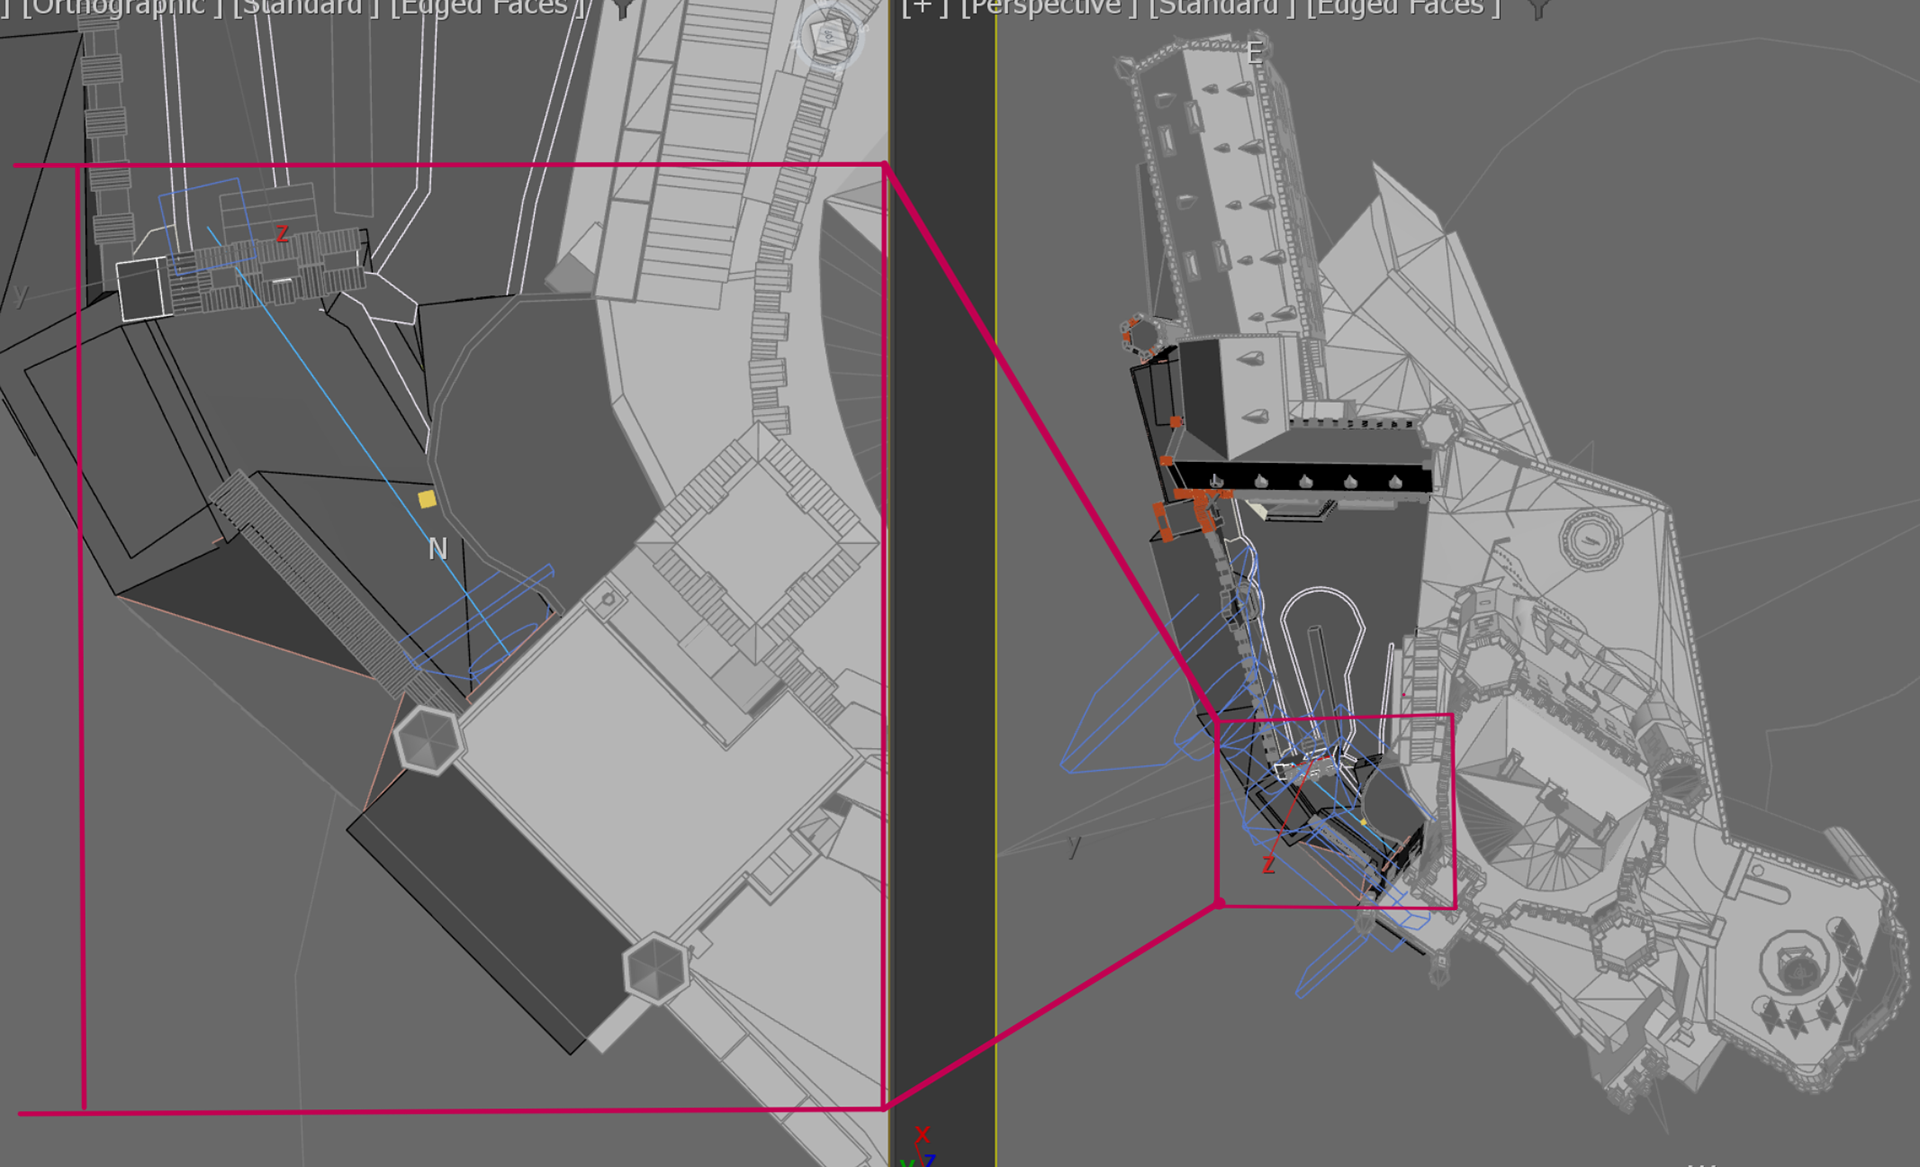
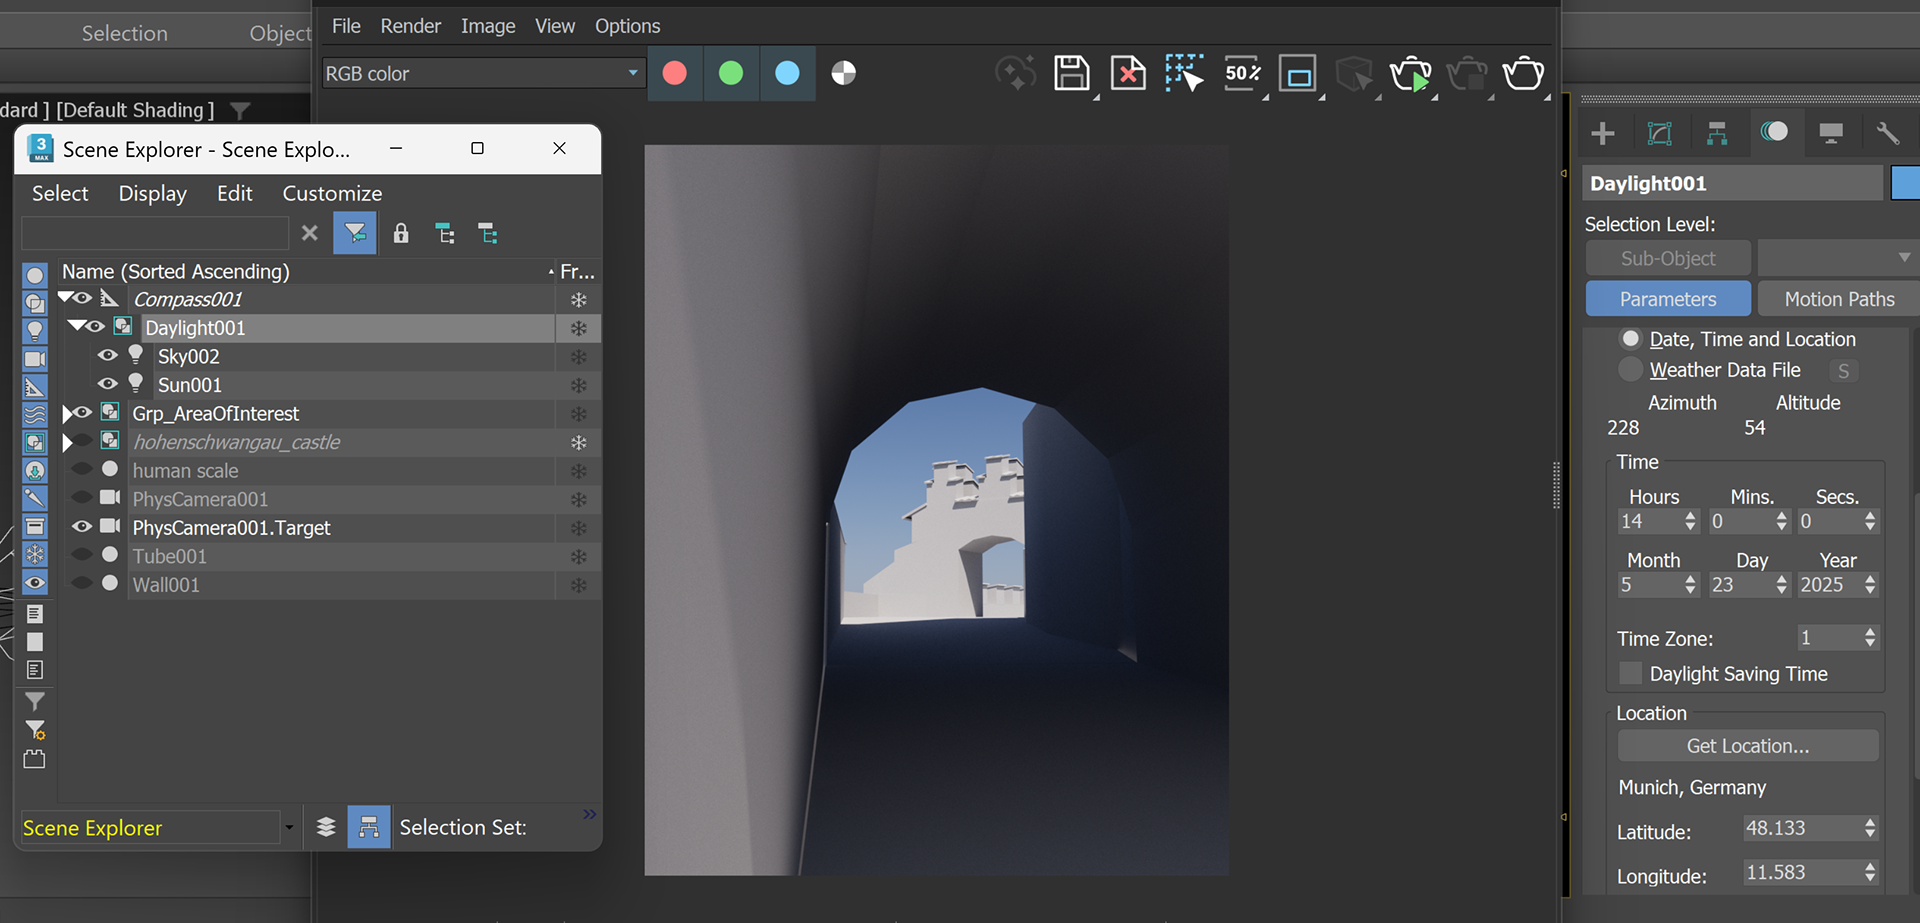
1. Scene blocking: Establish building orientation in relation to the compass North.
Import low res 3d Sketchup model found from 3d Warehouse into 3ds Max
2. Establish camera perspective, lens and focal length, area of interest
3. Establish daylight system setup from geographic data of the site
4. Separate out area of interest from the reference model for additional assets blocking on area of interest for high poly details later
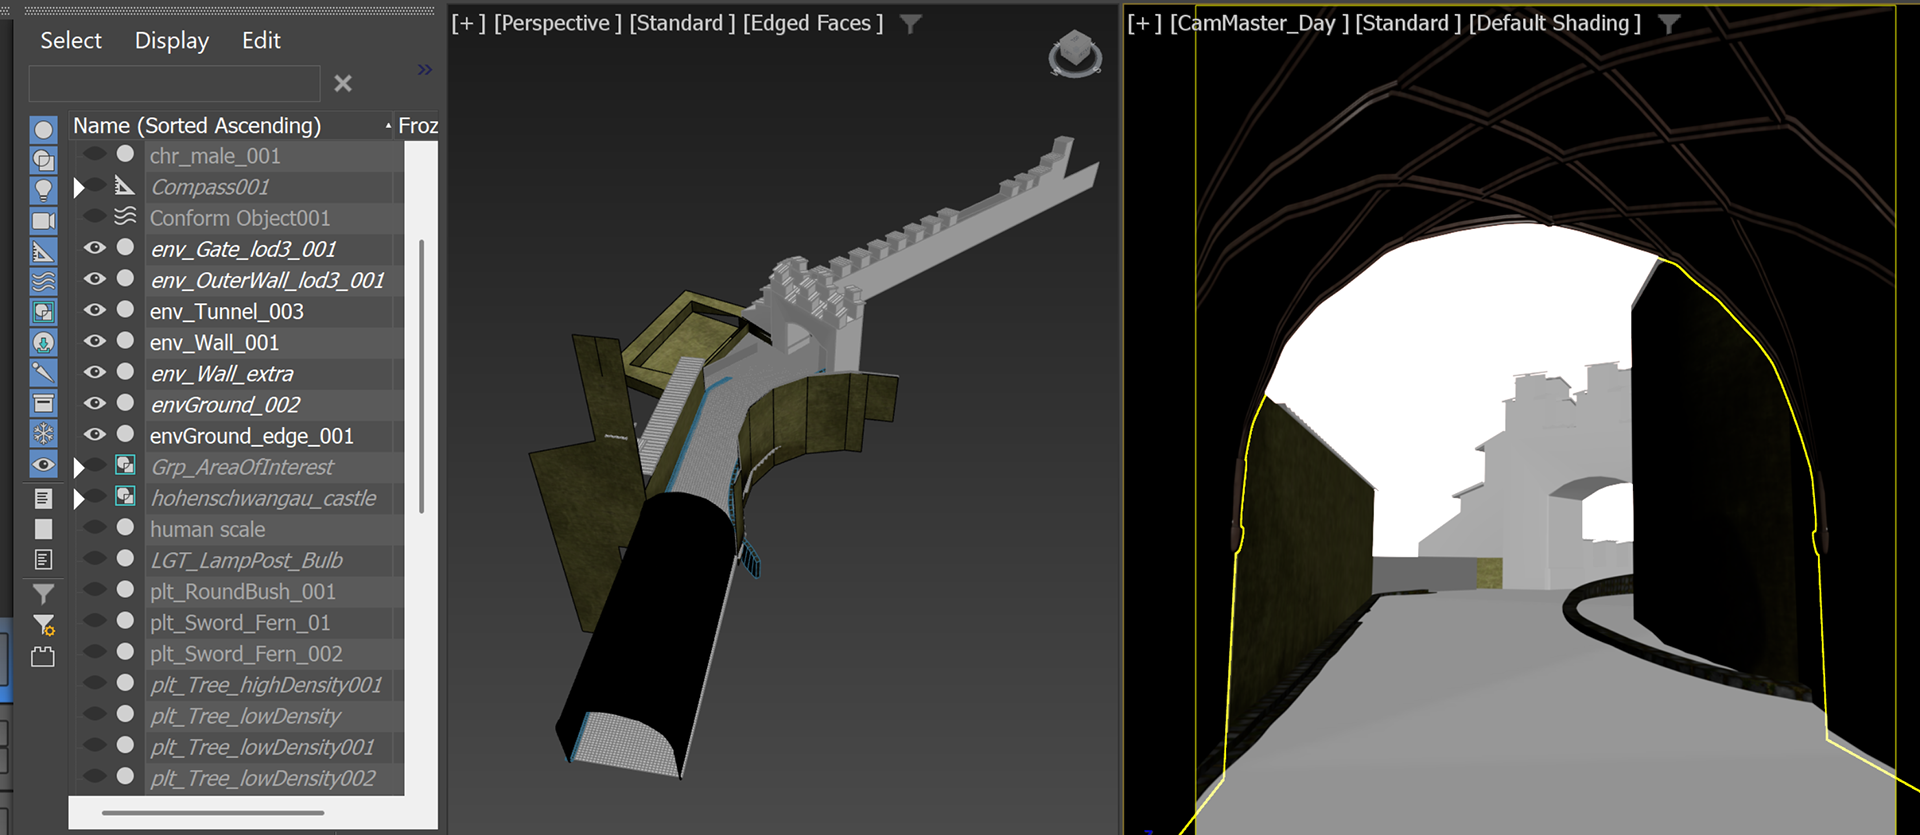
MODELLING
1. Separate out from reference model to make a list of assets to be built or rebuild, textures
2. Check and fix UVs of assets separated out from the base model
3. Model in extra details for scene dressing where it needed
4. Export out assets for texture painting in Substance Painter
LIGHT BLOCKING
1. Quick tests to evaluate different renderers for the render task. A quick test shows VRay renderer has better performance and photorealistic accuracy over Arnold and Scanline renderers
2. Setup basic light rig, establish sun/moon light direction. The goal is to get to neutral daylight lighting. Texture painting will be based off this light rig as colour reference point
TEXTURE PAINTING & PROCEDURAL MATERIAL BUILDING
1. Establish colour space management matching to 3ds Max for consistency in colour display
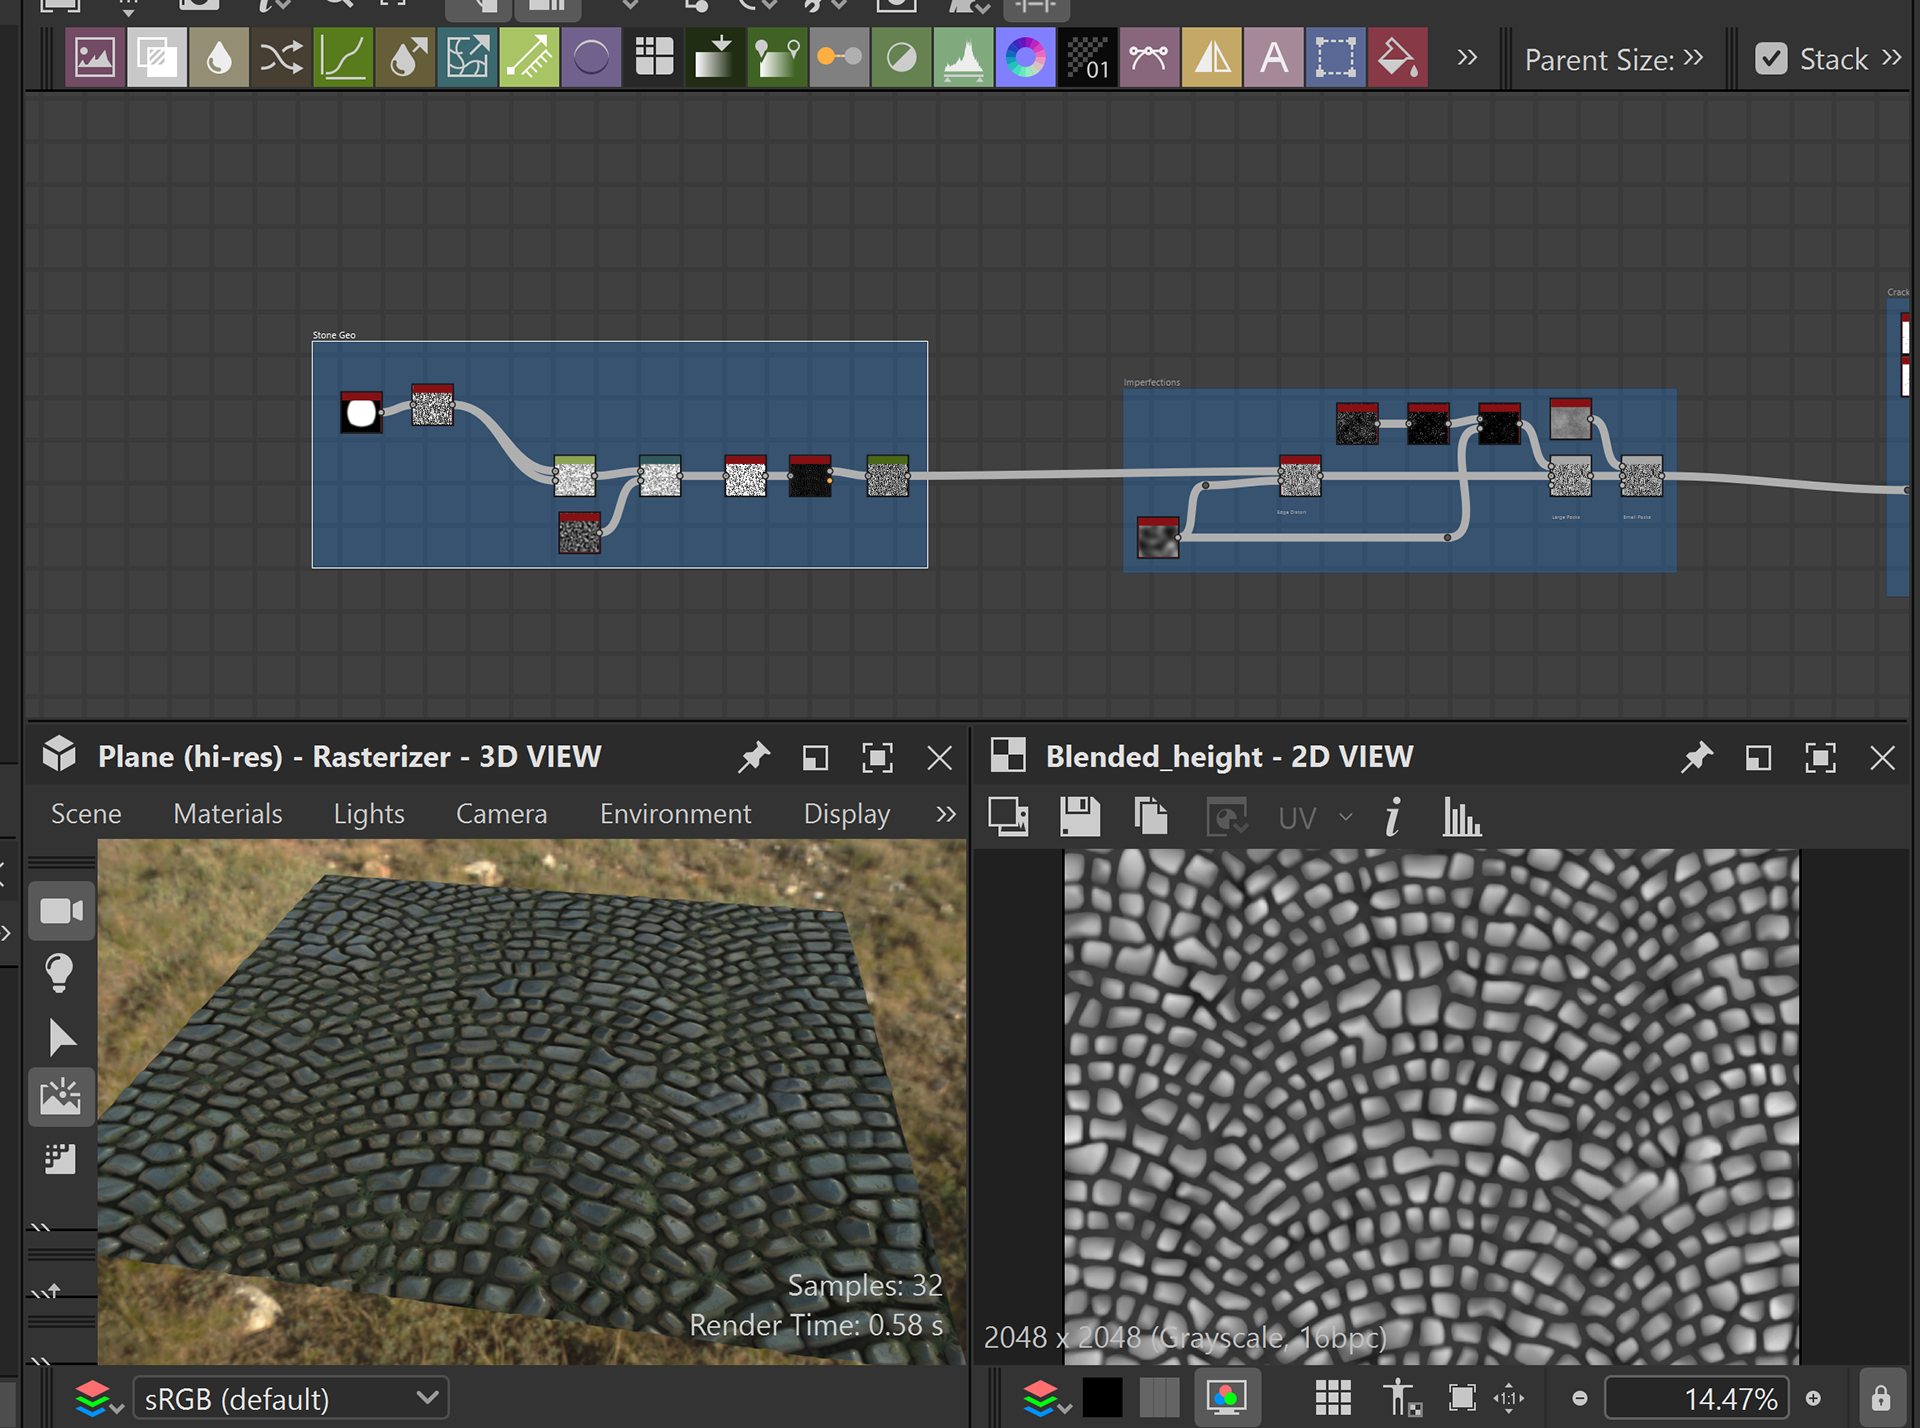
2. For highly customize textures such as the cobblestone ground, I built the entire material procedurally in Substance Designer. Then export out to Substance Painter for texture placements and additional touch ups. Then export out the texture maps to create the shader in 3ds Max
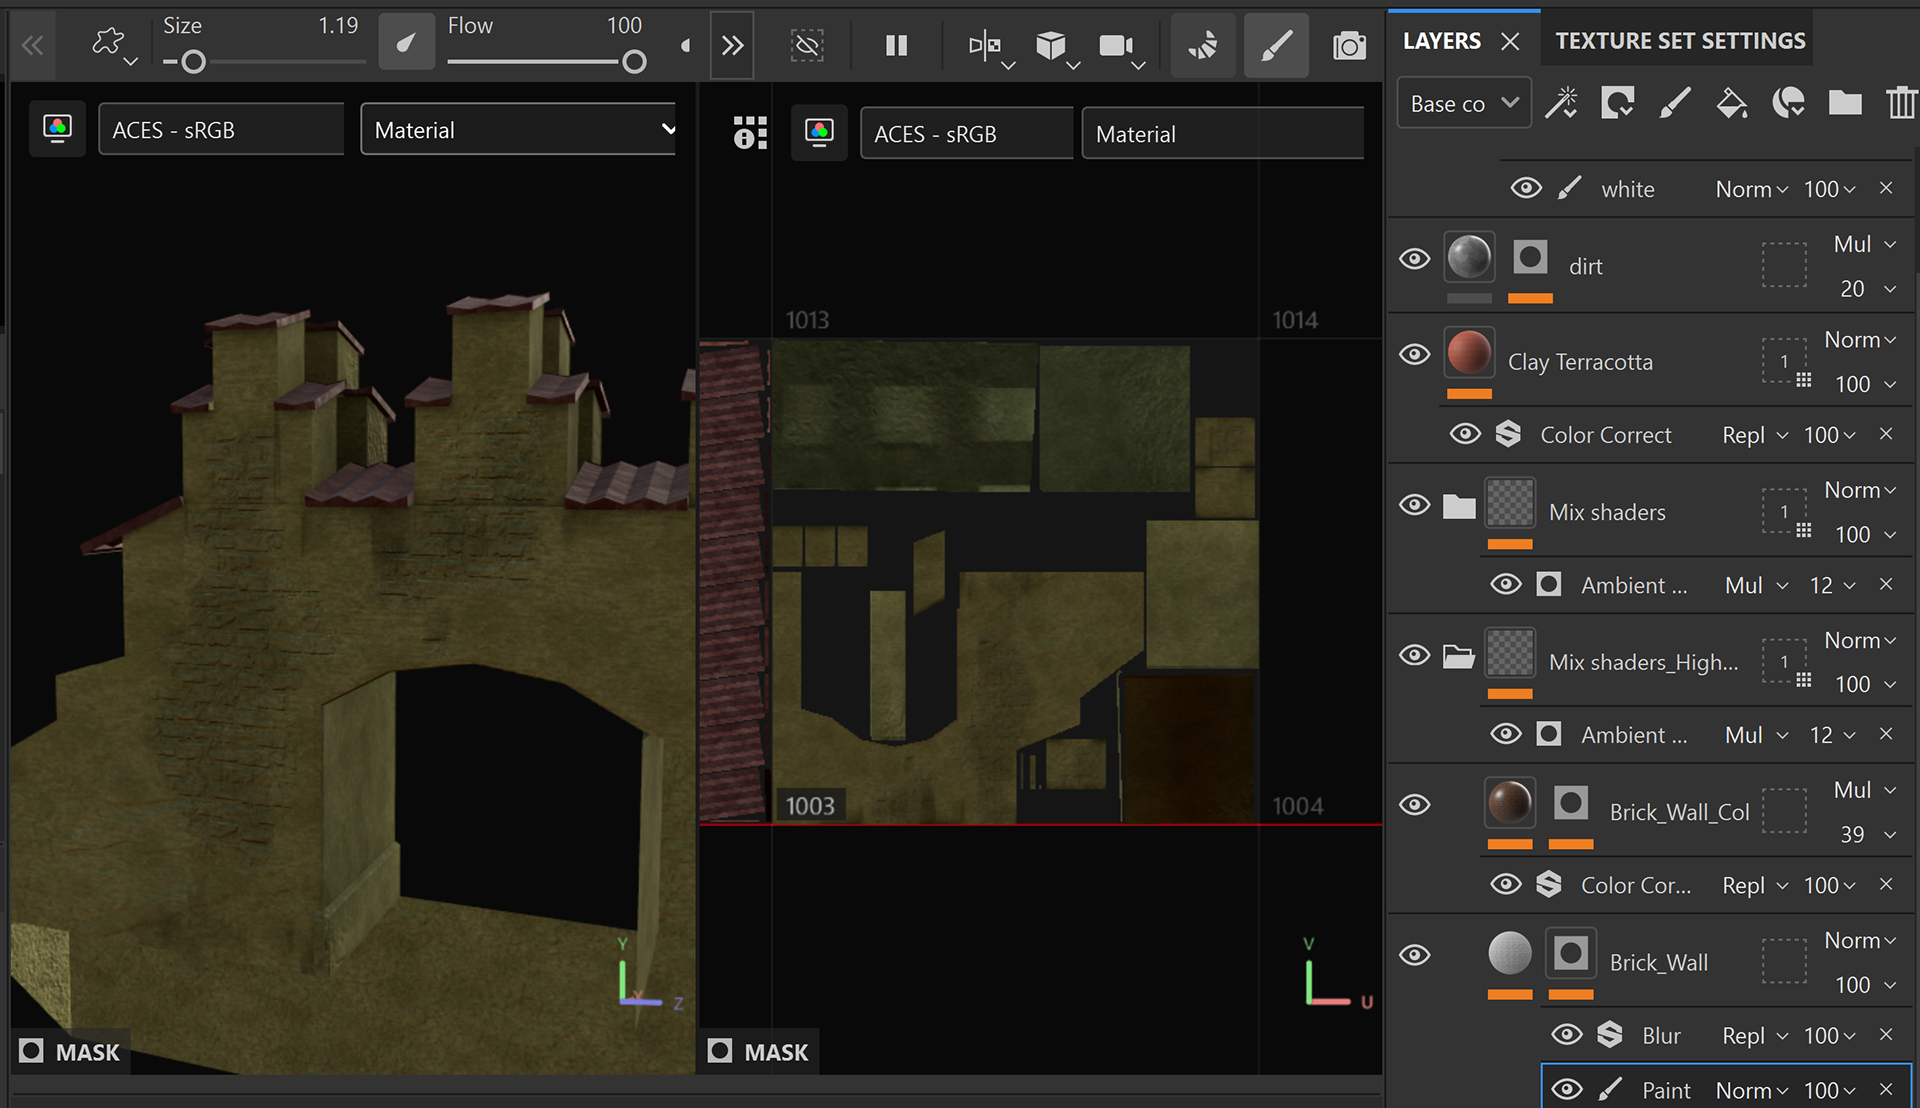
3. For more generic textures such as the walls, I use simple masks to mix layers of shaders in Substance Painter to create the look
SHADERS BUILDING
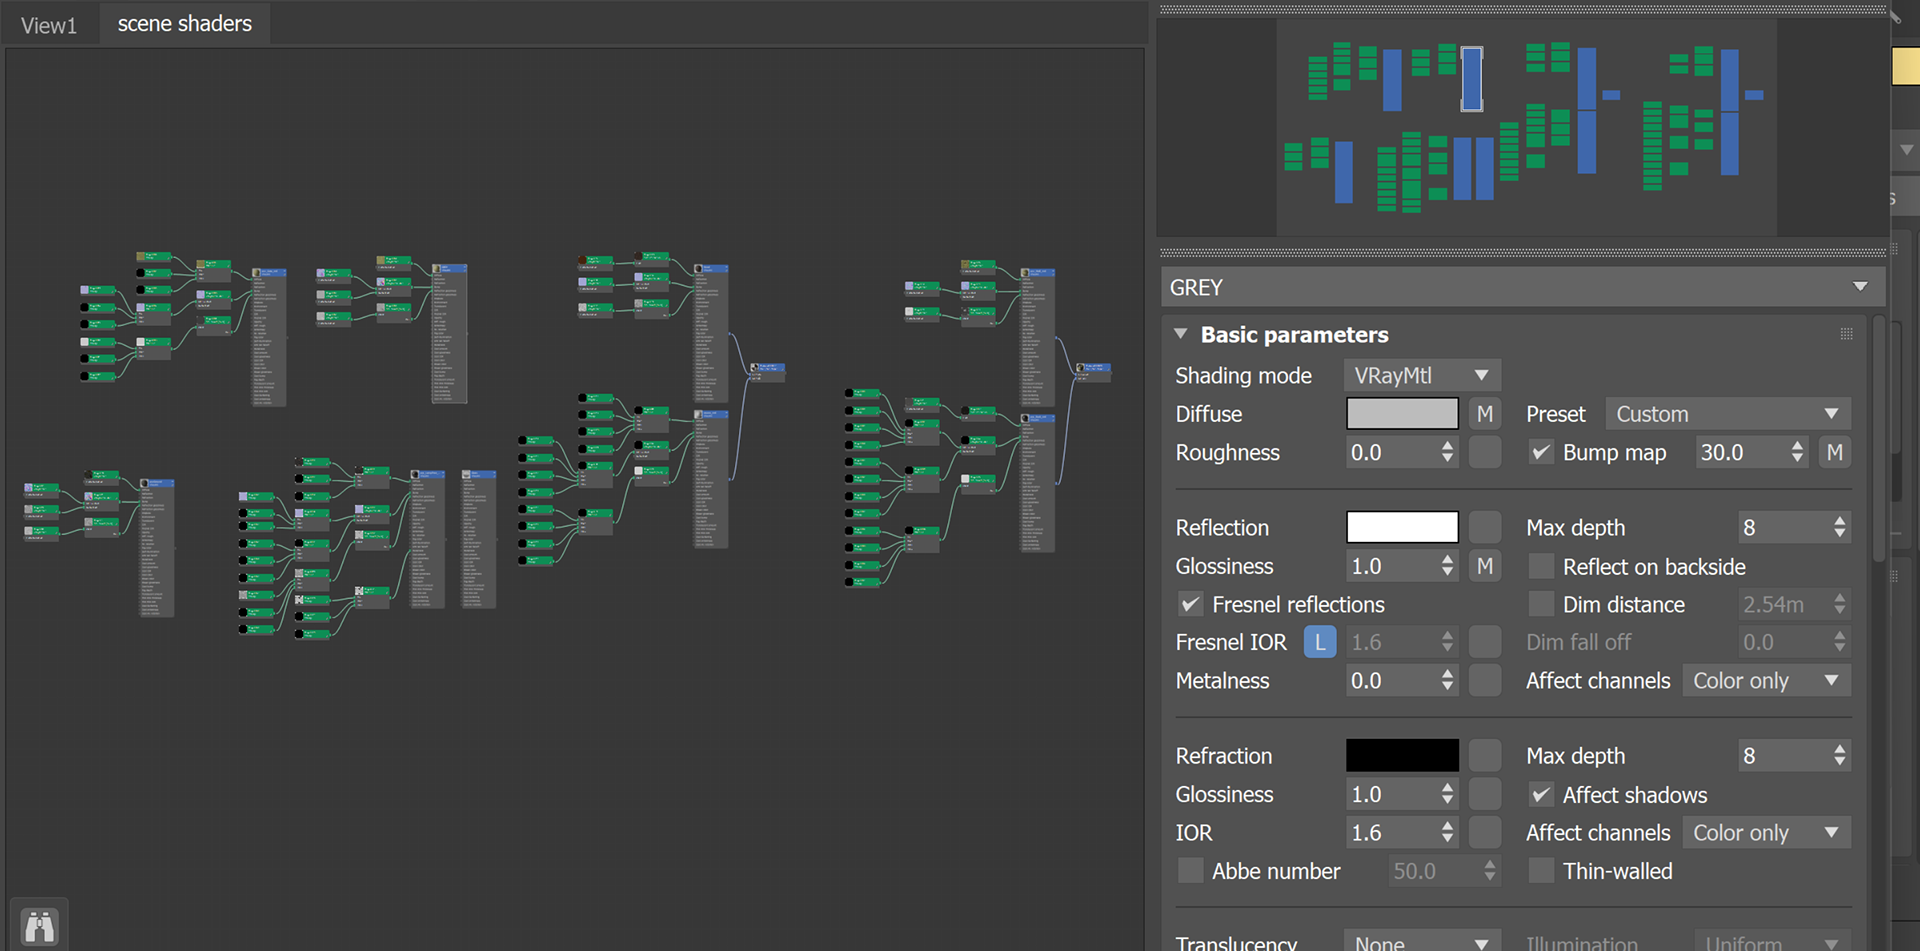
1. A lot of the physical details of the material properties are done in the texture maps. The texture maps are driving the colour, the strength of the reflection, refraction, normal, bump, displacement, metallic property... etc.
2. VRayMtl shaders are used in this project. Texture maps are imported into scene to build the shaders.
2. VRayMtl shaders are used in this project. Texture maps are imported into scene to build the shaders.
3. When physical properties are achieved in texture maps, it is easier to manage the shader because there will be very little setting tweaking require. It also helps to optimize the scene on shader level
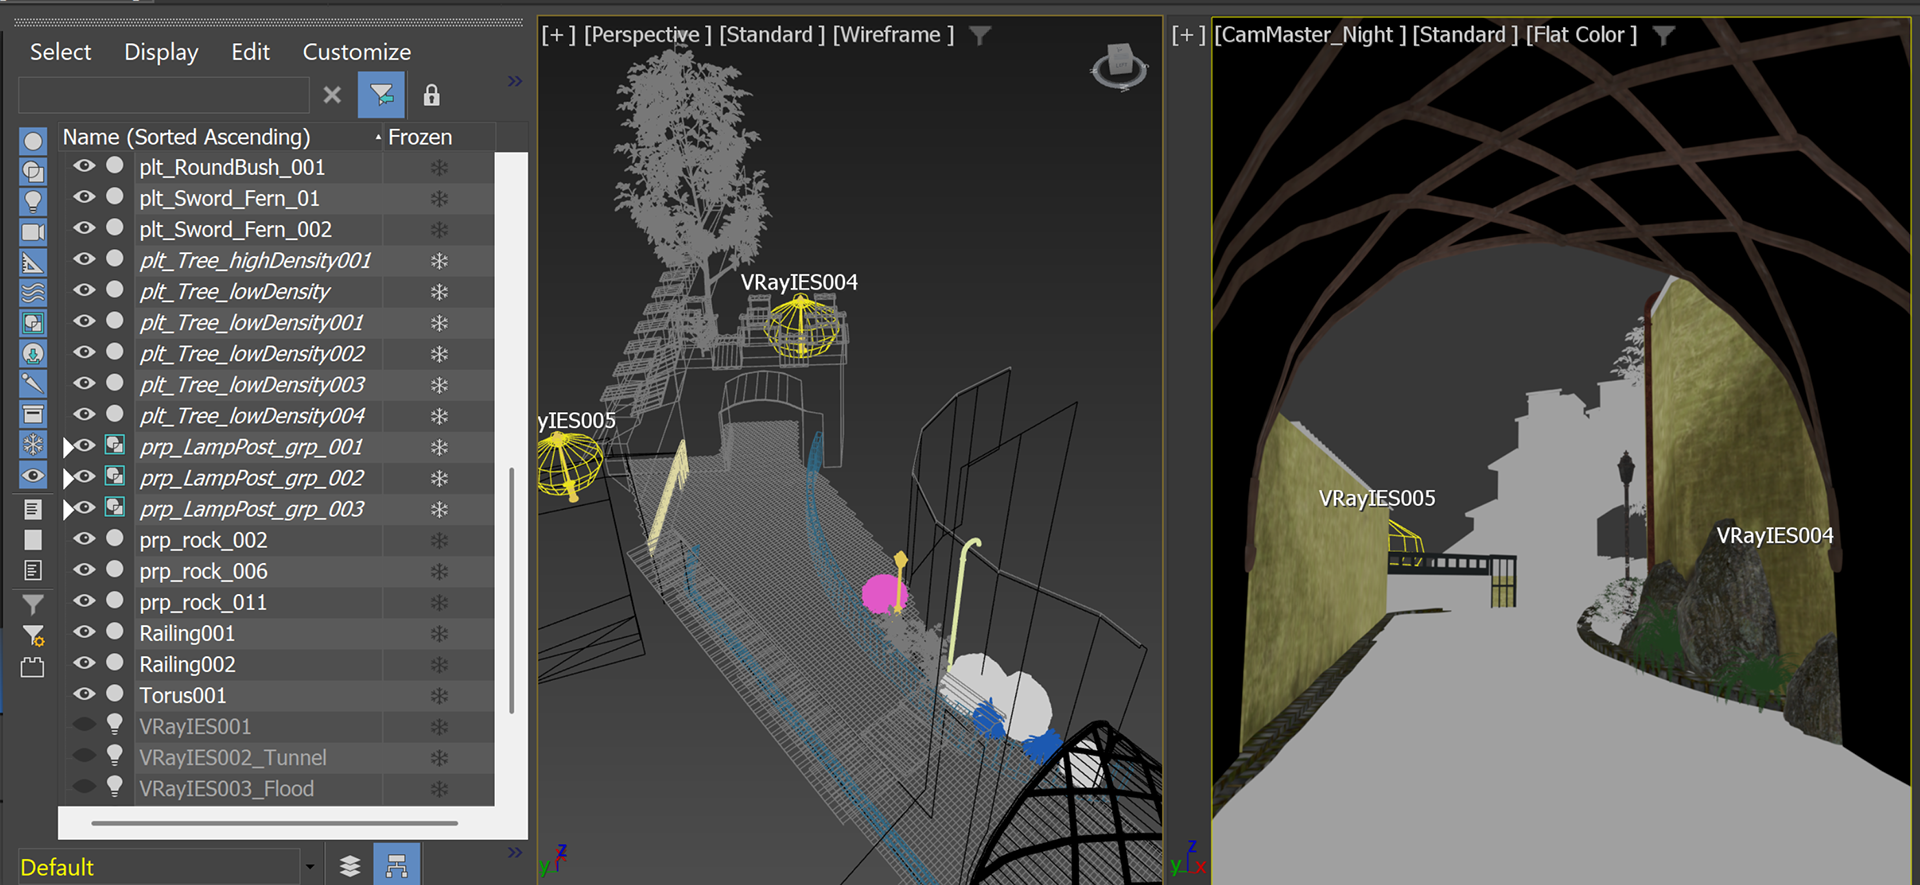
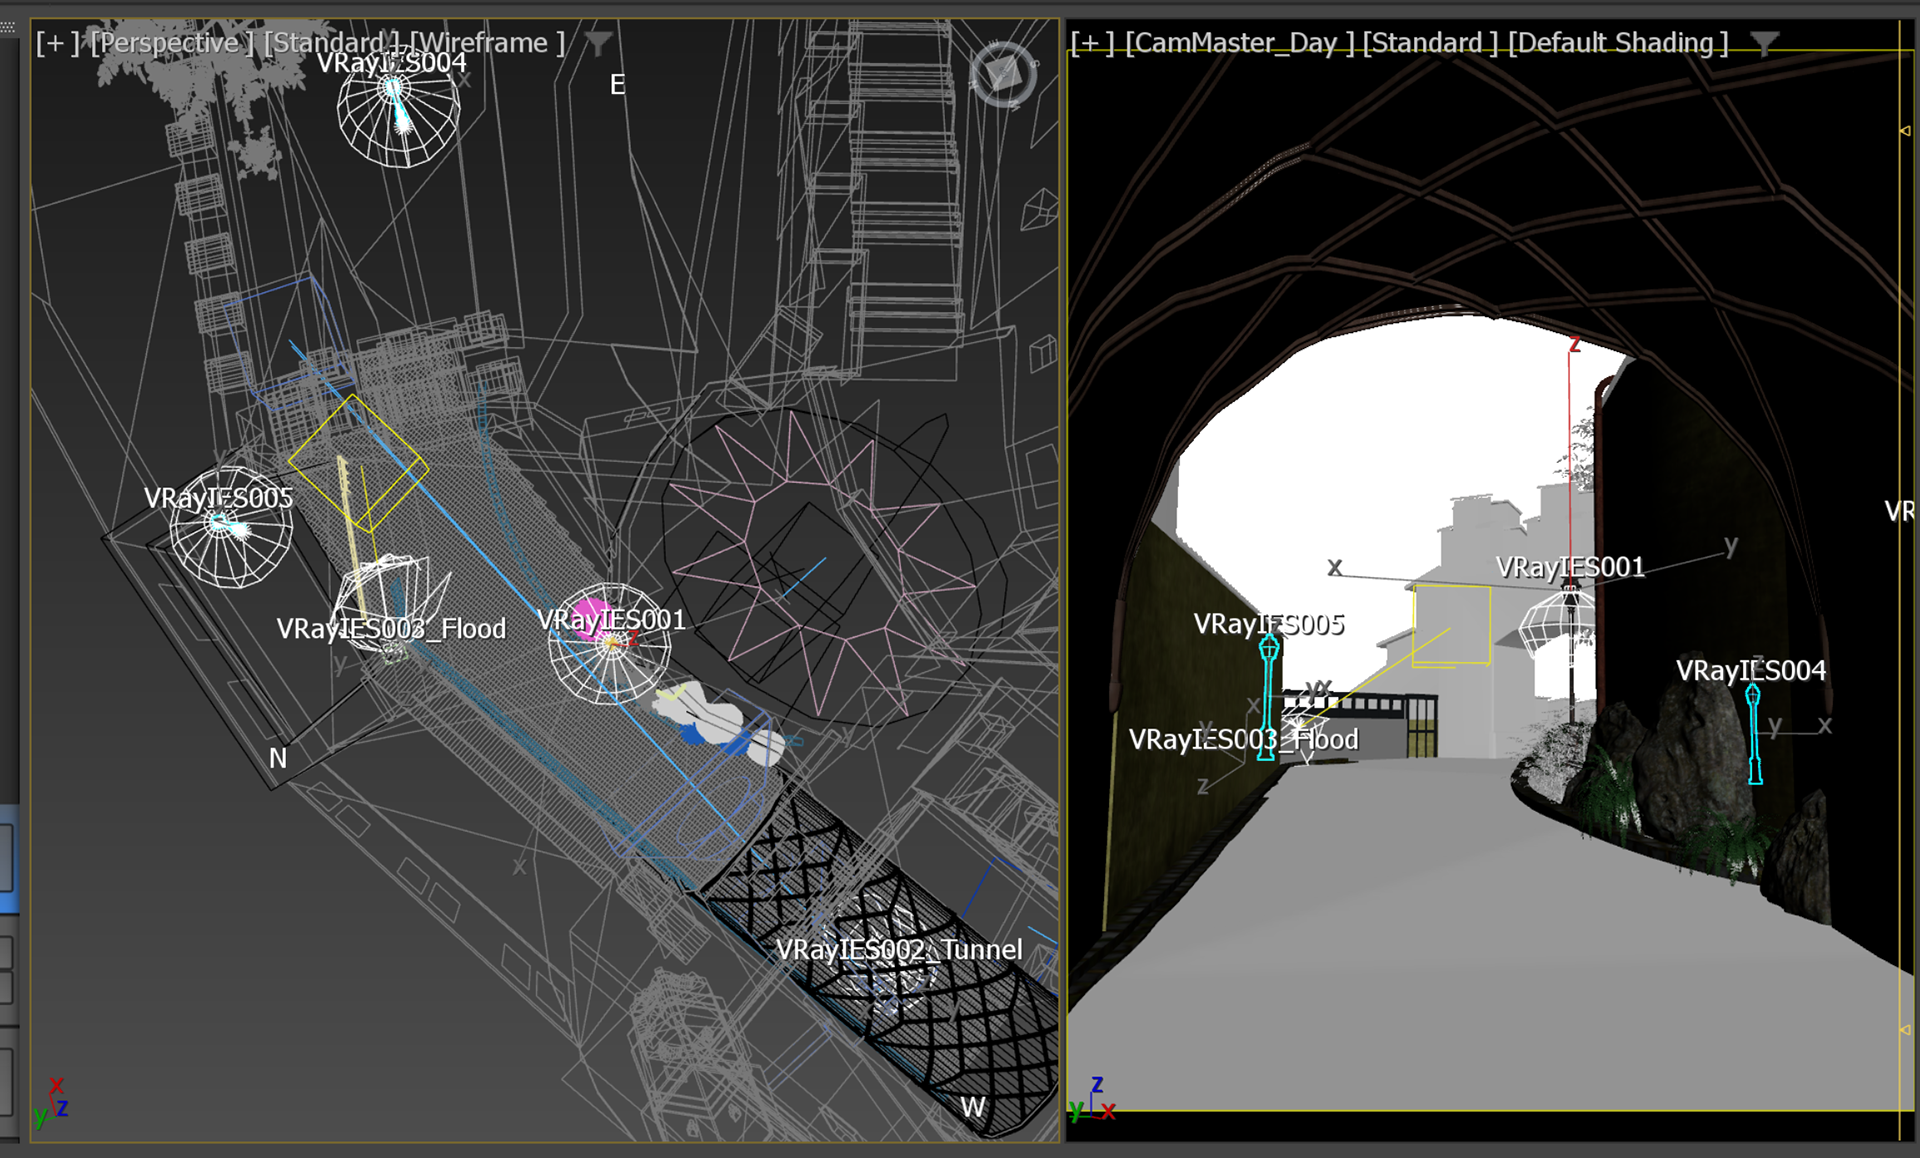
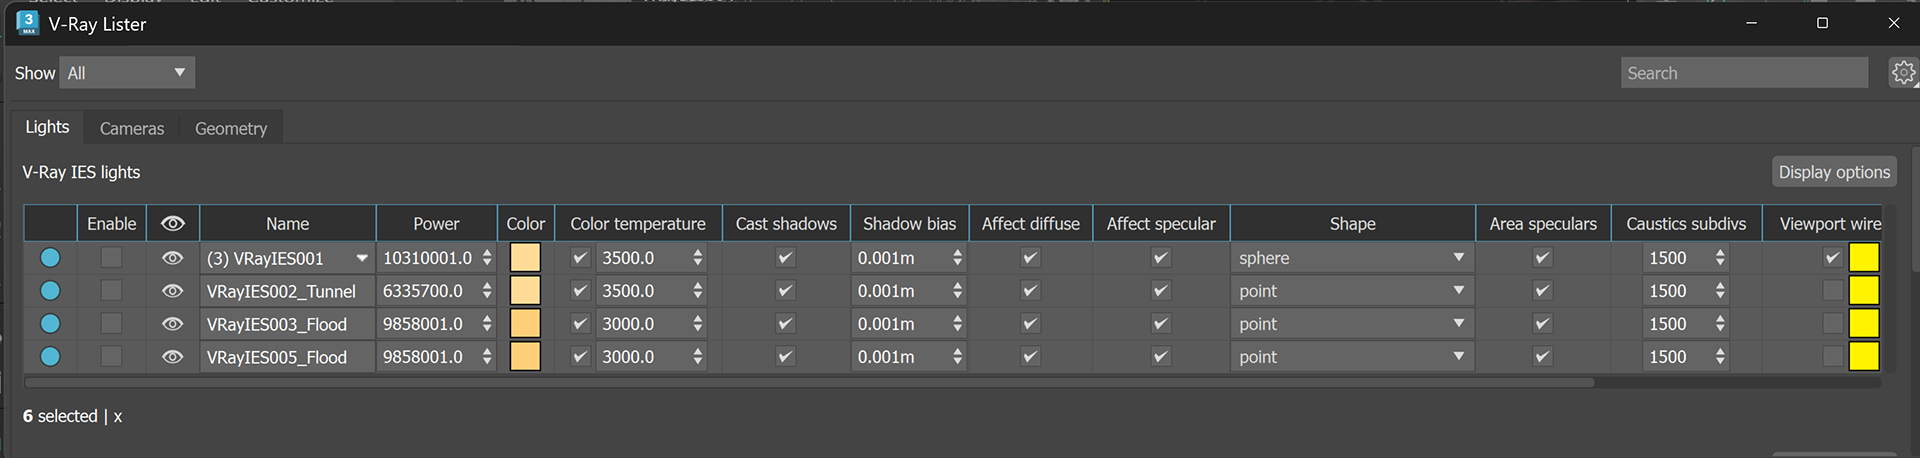
LIGHT RIG SETUP FOR NIGHT SCENE RENDER
1. Light placements to create a night look
2. For photorealistic accuracy, I used IES photometric files downloaded from Cooper Lighting Solutions
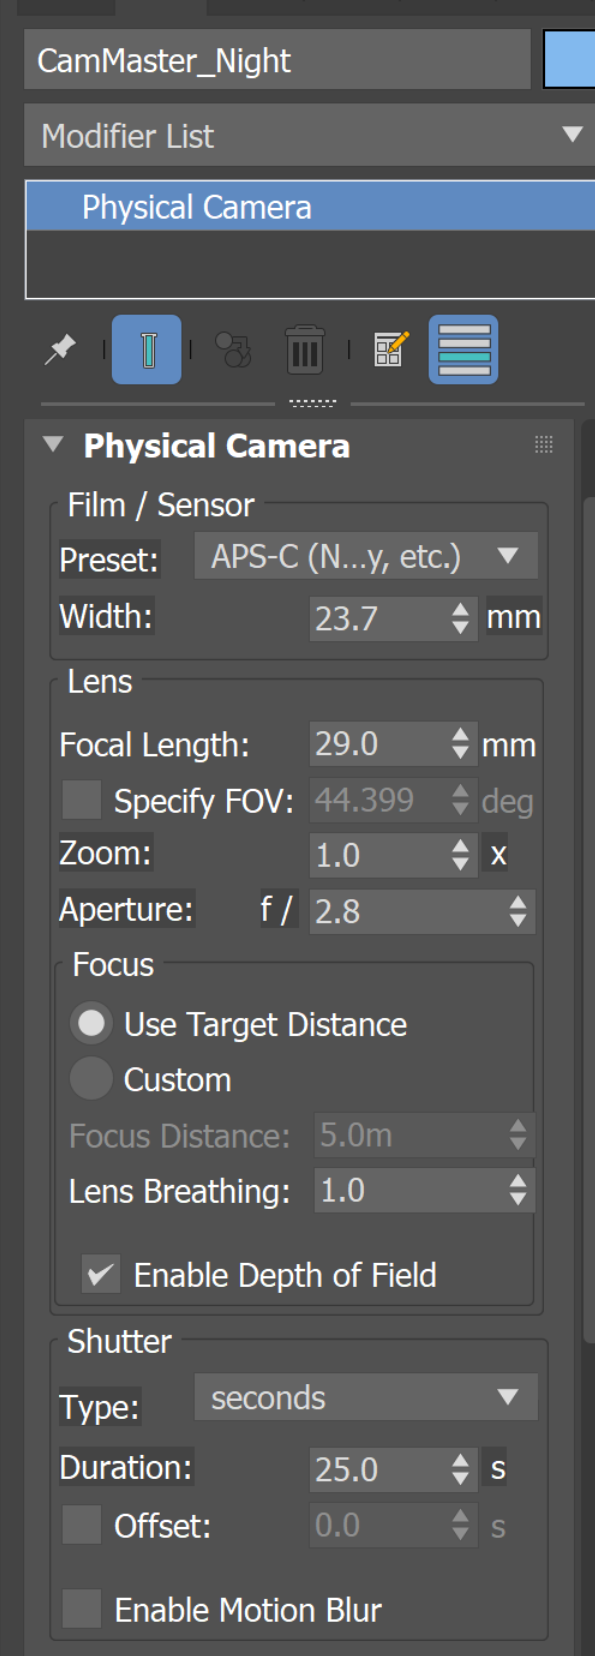
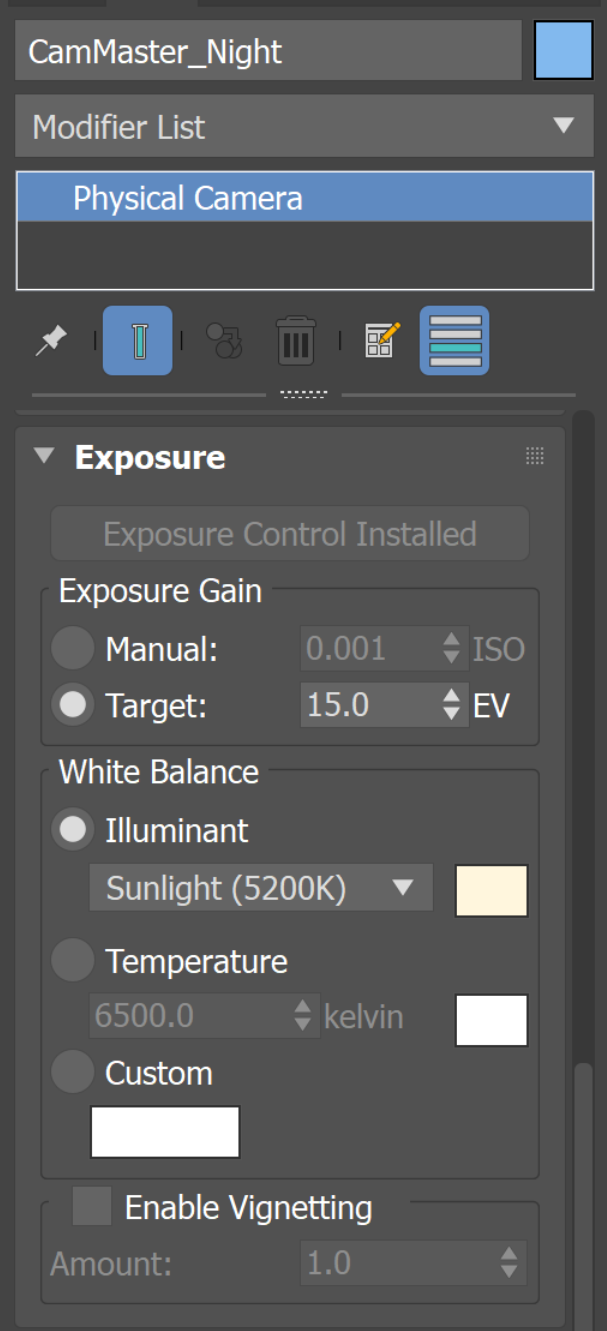
RENDER CAMERA SETUP FOR NIGHT SCENE
1. Tweak f-stop aperture, ISO value, shutter speed, white balance and Exposure gain on physical camera for night scene photography
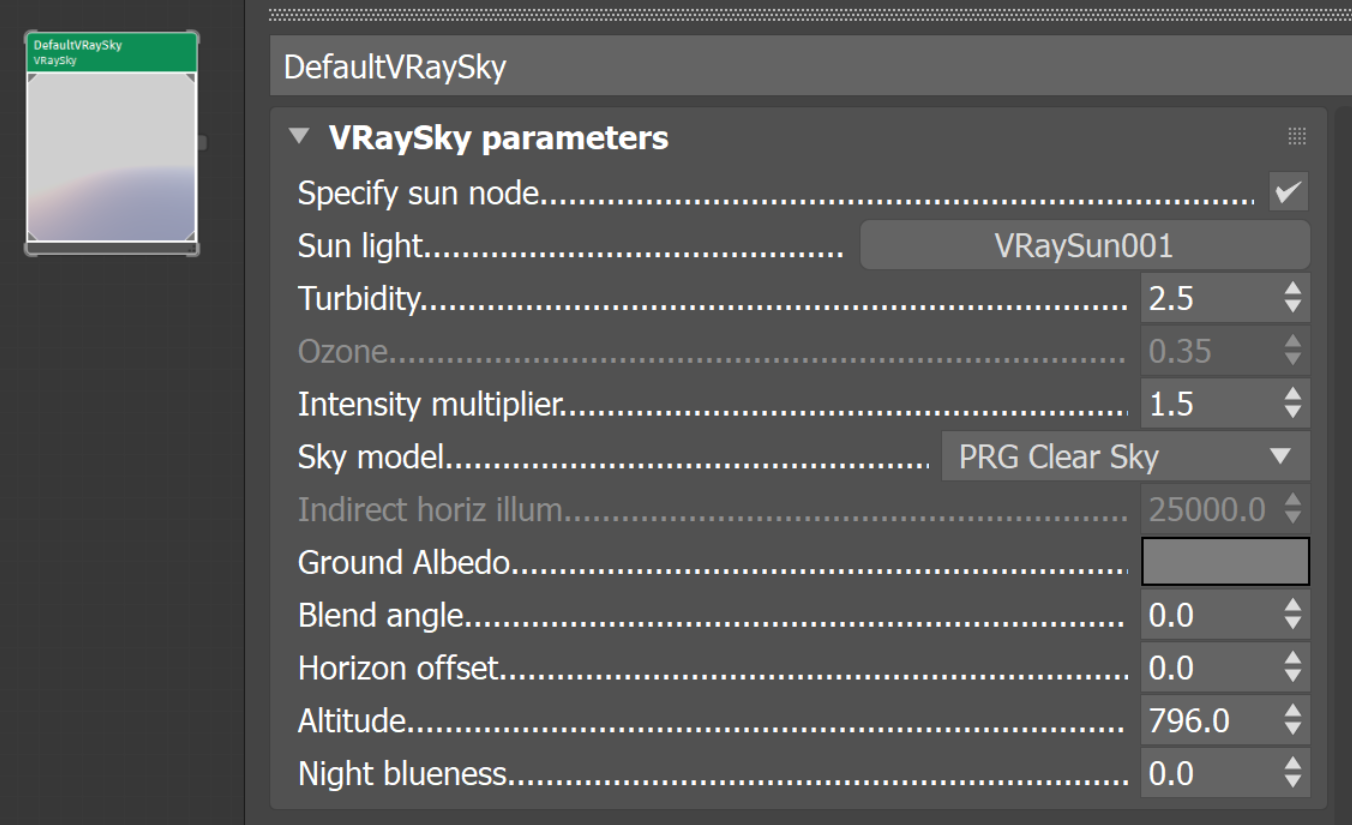
2. Adjust VRay sky settings for night exposure
3. Readjust scene lights intensity to work with the new camera settings. The light intensity is multiplied up to match the scene unit
RENDER FIRST PASS
1. Raw render and render passes are output as .exr for touch up later in Photoshop if needed.
However, since the goal is to achieve photography realism in CG, I generally aim to get close to 95% of the finally look all in CG. The remaining 5% is to touch up on reflection/refract, or create a specific atmospheric mood for storytelling that would otherwise be too expensive to achieve in 3D.
2. This image is rendered at resolution 1638 x 2048 and took about 1 hour 35 minutes to render

There are a few things I find after this render that I would like to fix before render for final quality, such as fixing the model of the center gate and better texture work on that asset.